Recently I was facing a weird problem with my Windows PC. My PC was struggling to open normal PC software like Windows Defender, Windows Explorer. But, my PC specification is enough to Handle big Games. After searching on many Windows forums, I found some useful information. And, People were addressing this problem as a “Windows 10/11 memory leak” problem. So, If you’re facing this kinda issue, or a high CPU usage issue, then read the complete article to know the solution.
Before start telling you about the memory leak issue in Windows 10 or Windows 11. One thing you need to know is that this isn’t a hardware issue. So, if someone tells you about replacing any part of your PC, don’t do it. You can fix high memory usage easily with some software fixes. Also, if your task manager not responding, then you can read my article to fix it.
What is Memory Leak in Windows 10/Windows 11, how to identify the issue?.
It doesn’t matter, Which Windows version you’re using on your PC. Because I have seen on forums, certain Windows 7 users also facing the same issue. There is no definition of memory leak, this issue starts to occur due to abnormal RAM usage. During normal usage and when you start your PC, It uses around 30 – 40 % RAM and CPU. But, If your windows have memory leak issues, then it uses around 80 – 90 % RAM and your CPU.
You can easily find out that your PC has, Windows 10 memory leak problem.
- If you’re using Windows 10 PC, then right-click on the start button, and open Task manager. Or If you’re using any other version of Windows, then press Ctrl + Alt + Delete hotkey.
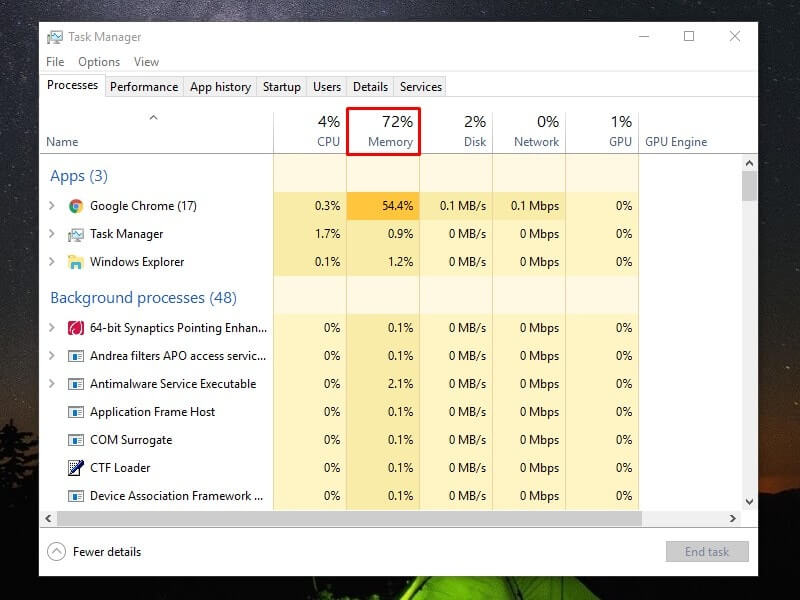
- In Task Manager Window, Click on the Performance tab to see CPU and RAM usage. Here you can see, the percentage of RAM and CPU your PC is using. Make sure, programs that need a high amount of RAM are Closed. If the CPU and RAM percentage is above 80. Then your PC has high memory usage or abnormal RAM usage issue.
“According to some researchers, this issue remains passive in the first few hours of window use. Later, it takes over all available free memory and a large portion of CPU.”
Currently, Nobody knows the exact reason behind this abnormal RAM and CPU usage issue. But according to some expert Windows Users, this issue occurs mainly due to a system process (ntoskrnl.exe). No matter what is the cause of this problem. But, if you’re facing this problem. Then surely, it is not Something that you can Ignore. So, without wasting further time in figuring out the cause of this problem. Let’s start, trying some solution to fix the Memory leak in Windows 10.
Solutions: Windows 10/11 Memory Leak and free up RAM.
Check startup programs and disable them.
Before start moving to a complex solution, let’s start this article with some simple solutions. When you start your Windows PC or laptop, there are some programs that automatically get started. Some of them are system program, which is necessary to start automatically. But there are some third-party services, which get started without your permission. And, It could be possible that any specific program is using a high amount of RAM and CPU.
How to find out the startup program and disable them?.
With the help of the task manager, you can find out the startup program and can disable them easily.
Step: 1 Open task manager on your Windows PC or laptop.
(Follow the procedure mentioned above to open Task Manager.)
Step: 2 In the task manager, click on the Startup tab. This tab will show you all programs, that get started automatically.
(These programs also increase startup time of PC, by disabling them you can boost PC startup.)
Step: 3 To disable any unwanted startup program, Right Click on it and then select disable option.
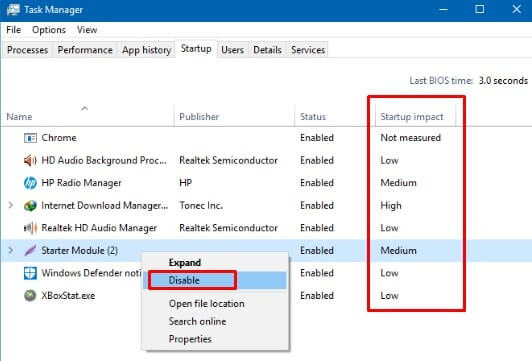
(You can also able to see startup impact If any program makes a high impact. Then disable that program first, to fix the memory leak issue.)
Terminate Process and Restart device.
The best part about Windows is you can find out, Which processes or program is using much RAM. And, also you can terminate these processes easily with the task manager. To close all these processes, follow these instructions. With this solution, you can surely fix Windows 10 memory leak issue.
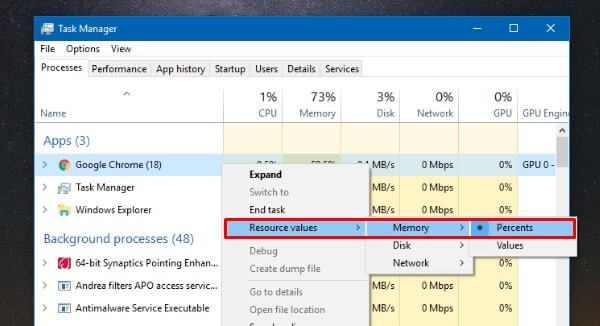
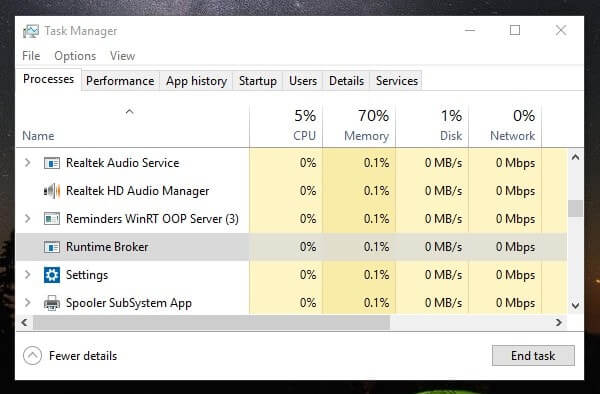
Step: 1 Open Task Manager, by following the above instructions. Now, Click on the processes tab in the task manager.
Step: 2 To view memory usage and CPU usage, in the form of the percentage. Right Click on any process and go to Resource values > memory > select percent option.
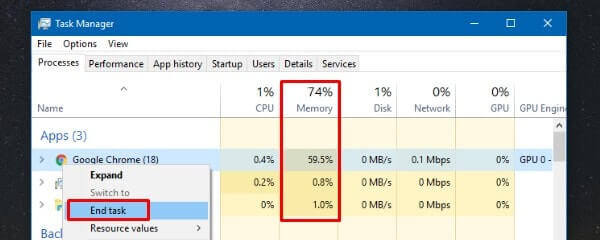
Step: 3 Now, find out which task is causing the memory leak windows 10, and occupying the high amount of RAM.
– And, then right-click on it and choose End task option. (Don’t terminate the process, if you don’t know what is it.)
Also, don’t forget to restart your computer.
As I mentioned before, a Windows memory leak occurs due to ntoskrnl.exe. So, before closing others’ tasks, first, find out this task and close it. And if you’re not able to find out that particular task. Then maybe a memory leak issue is occurring due, to some other processes.
What is ntoskrnl.exe?.
In simple words, It is the Windows NT operating system kernel image. And, a fundamental part of Windows OS. which is responsible for various system services and most important hardware virtualization.
Runtime Broker – According to some users, this process is using a high amount of memory. By default, the service should use a low amount of RAM and CPU usage. This process helps to manage, the permission of Windows Store Apps.
Use DISM in CMD.
If you’re sure that problem is occurring due to the Windows NT kernel image (ntoskrnl.exe). Then with the DISM tool, you can fix Windows 10/Windows 11 memory leak problem. It could be possible that Windows files got corrupted so run all commands mentioned below to repair Windows 11.
Step: 1 In Windows 10 Right Click on the Start button and choose Command Promot (Admin).
(If you’re using the latest version of Windows. Then instead of a command prompt you will be able to see Windows PowerShell.)
Step: 2 In the command prompt or Windows PowerShell type the following command one by one and press enter. Wait for each command to execute completely. Don’t interrupt the process.
1. DISM /Online /Cleanup-Image /CheckHealth

2. DISM /Online /Cleanup-Image /ScanHealth

3. DISM /Online /Cleanup-Image /RestoreHealth

4. DISM /Online /Cleanup-Image /RestoreHealth /Source:repairSource\install.wim
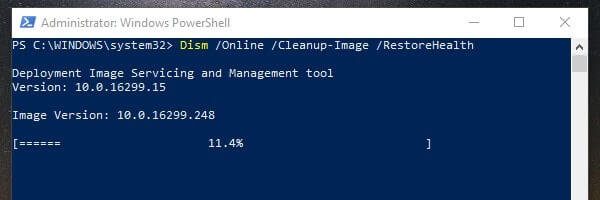
DISM – Deployment Image Servicing and Management Tool.
This process will take a minute to initialize, And takes around 15-30 minutes to complete. After completing the process, you need to restart the PC to apply Changes.
Adjust for Best Performance.
With Windows 10 memory leak issue, if you’re also facing high CPU Usage. Then you can try this solution, this solution not going to make big changes. But after trying out this solution, the performance of PC may increase.
Step: 1 Right Click on My Computer or My PC and then click on the Properties button.
In properties click on Advanced System Settings.
Step: 2 In the system properties and advanced tab, click on the settings option. (Check under Performance section.)
Step: 3 Now, select Adjust for best performance option and, then Click on Apply then OK.
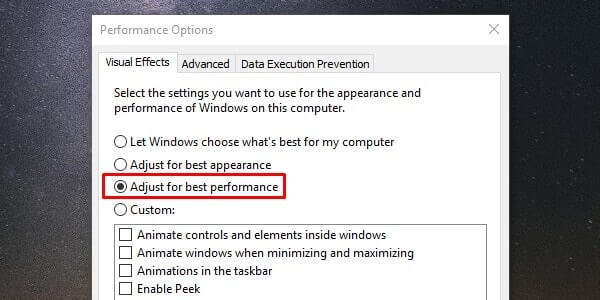
To apply changes done in these settings, you need to restart the PC.
Check for driver updates.
Personally, I don’t think this solution is useful here. But many windows forums are suggesting updating outdated drivers. According to them, the Outdated driver allows the device to use more memory than is required. So to free up RAM and fix the memory leak issue update all drivers.
Step: 1 To check which driver is Outdated. Right Click on the Start button in Windows 10 and choose the device manager.
In the device manager, check if you’re able to see the yellow sign in front of any driver. (Yellow mark indicates that the driver is outdated.)

Step: 2 And to update any driver, Right Click on it and choose the update driver option. After that, follow the instructions mentioned in the update window.
Or, If you’re unable to recognize an outdated driver then you can download UniBlue Driver Scanner software.
Stop Super-fetch.
It is a Windows service, Which is made to optimize the performance of the Windows OS. This process helps Windows to manage RAM and helps in decreasing boot time. Although, It has some negative effects on the system, which causes slow system issues. Especially, the low-performance issue occurs while gaming. I don’t recommend stopping this service Permanently. That’s why I suggest you stop this service for a while. And check your Windows 10 memory leak and high CPU usage issue got resolved or not.
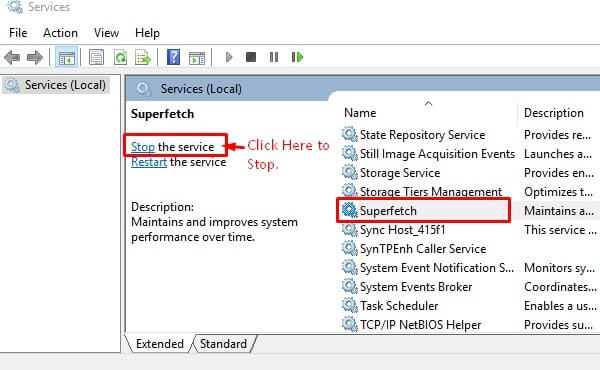
Step: 1 Press Windows + R key and open run Window. Type services.msc and press enter. (this small command will help you to open the services tab directly.)
Step: 2 In services look for the Superfetch and then right-click on it. And you”ll get the option to stop this Service.
Change Value in Registry.
If after trying all the above-mentioned solutions, still, a high memory usage problem occurs. Then try this solution also, maybe this solution can help you a bit. Also, do create a registry backup before following this solution.
Step: 1 Press Windows + R key and type Regedit to open the Windows registry editor.
(Don’t make any unnecessary changes, else system failure can happen.)
Step: 2 Now go to the following directory.
HKEY_LOCAL_MACHINE\SYSTEM\CurrentControlSet\Control\Session Manager\Memory Management
And search for ClearPageFileAtShutdown, and modify its value from 0 to 1 and click on OK. (Right Click on it to get the option.)

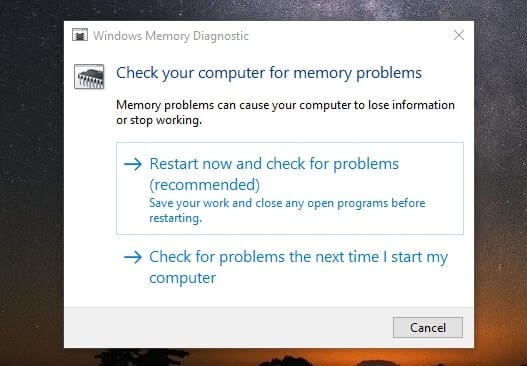
Windows Memory Diagnostic.
This is one of the best solutions to fix the Windows 10 memory leak problem. Windows comes with a built-in Windows memory diagnostic tool. This tool automatically checks all problems related to memory and, fix them automatically.
Step: 1 Press Windows + r key and then type mdsched.exe and press enter.
Step: 2 Now, a window will appear and will provide you with an option.
Click on restart now and check the Problems option.
Now, it gets started automatically after restarting the PC. There are three tests you can perform Basic, standard, or extended. (You can use the F10 key to perform a scan.)
But, if you have never done something like this before. Then you can skip this solution and move to the final solution.
Reset or Clean Install Windows.
If after trying all 8 solutions mentioned above, Still, CPU usage is showing 100. And also memory usage is showing above 80 – 90 percent. Then you can RESET the PC. After resetting the PC, the PC will go into its default settings.
And, don’t forget to create a backup of your important files, before trying this solution.
Go to settings > Update & Security > Recovery > Reset this PC.
Alternatively, you can use the Windows media creation tool and create a bootable drive to Clean Install Windows.