Apple finally released it’s most awaited OS macOS Sequoia. And, it comes with so many new features like iPhone Mirroring, iPhone notifications on Mac, Seamless drag and drop between devices, Easy window tiling, Passwords App, new Safari features, Apple Intelligence (Image Playground, New Writing Tools, ChatGPT, Image Cleanup) and much more. In macOS Ventura Apple redesigned its settings App. So, from macOS Ventura, system settings App looks like the iPad OS settings App. Apart from this, Apple replaced the Keyboard Brightness icon in Control Centre with the Stage Manager. Because of this, many users aren’t able to change their keyboard brightness in macOS.
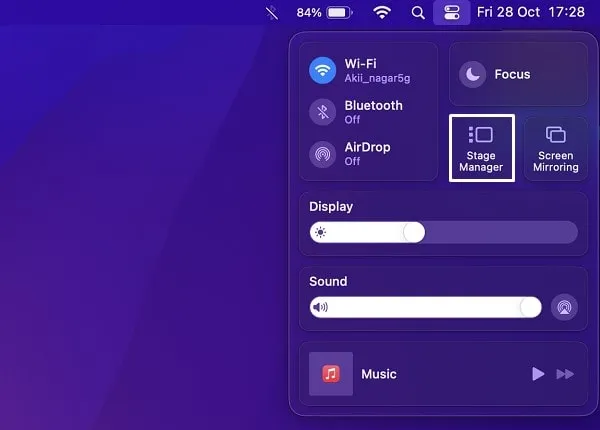
And, if you’re also an iMac, MacBook Pro, MacBook Air M1, or M2 user. And, upgradedto macOS Sequoia. Then, no need to worry, you can get back the Keyboard Brightness icon in Control Centre. Also, in the new macOS Monterey, you get more options to manage your Keyboard Brightness. Moreover, With the new system settings app, you can also show a custom message on macOS Lock Screen.
Add Keyboard Brightness Option in Control Centre and Menu Bar
If you just want to get back the Keyboard Brightness option in Control Centre. Then, you can easily enable it from the new macOS Sequoia System Settings. But, you cannot replace it with the Stage Manager option.
- Click on the Apple icon from the upper-right corner of the screen, and click on “system settings”. Alternatively, you can open system settings from launchpad.
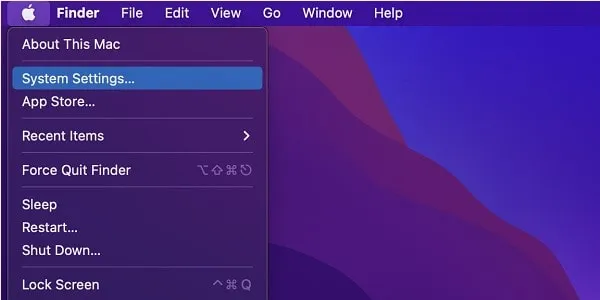
- Once, the system settings app gets opened, click on Control Centre from the left pane.
- Scroll down and you will see the Keyboard Brightness section. And, you will find the following two options.
- Show in Menu Bar
- Show in Control Centre
- You can now add the Keyboard Brightness option in the menu or Control Centre. Just do enable the respective option of it.
- Personally, I suggest you add it to the menu bar. With it, you can quickly open the keyboard brightness slider. Enable the “Show in Menu Bar” option.
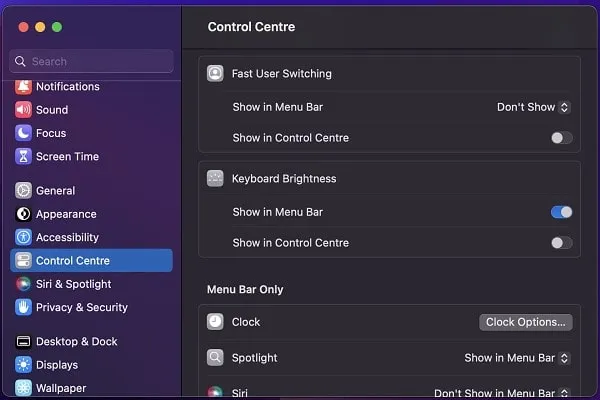
- And, keyboard brightness icon will appear in the menu bar.

- And, if you want to get back it into the Control Centre, then do enable the “Show in Control Centre” option.
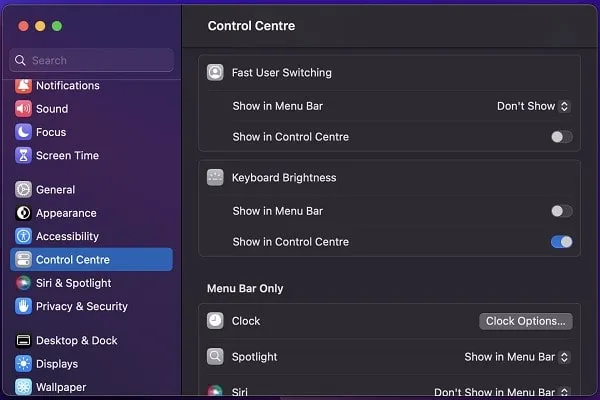
- Once you enable the Keyboard Brightness feature, it will show at the bottom of the Control Centre.
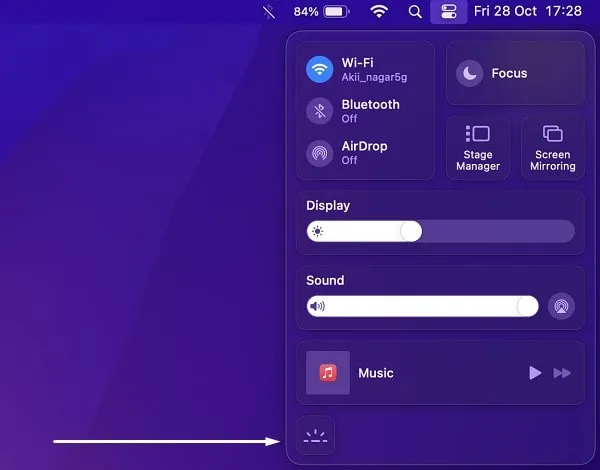
So, that’s how you can get back the missing keyboard brightness option in macOS Sequoia.
Change Keyboard Brightness using System Settings in macOS Sequoia
From the Brightness Control Slider in Control Centre and Menu bar, you can only increase and decrease brightness. But, if you want to enable auto-adjust keyboard brightness, and, other important settings, then, follow these steps:
- Click on Apple Menu, and after that click on System Settings to Launch macOS Sequoia Settings.
- Scroll down from the left pane and then click on Keyboard.
- From here, you can change the keyboard brightness of your Macbook. Also, you can enable “Adjust keyboard brightness in low light”. This option will increase and decrease keyboard brightness when you’re in low light.
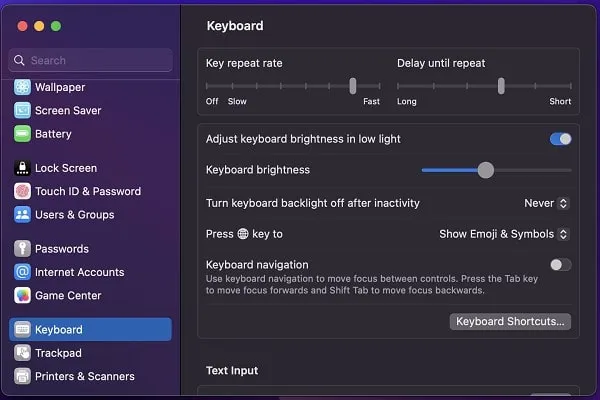
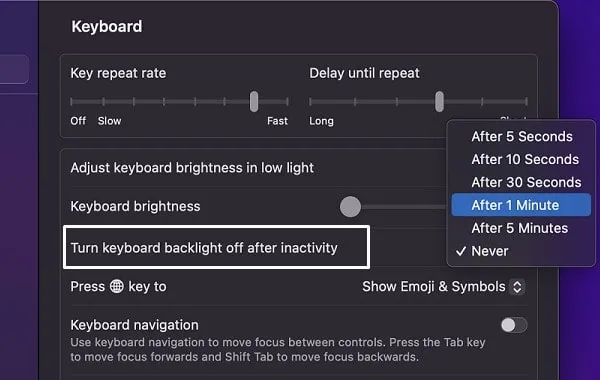
- Moreover, you can also manage “Turn off keyboard backlight after inactivity”. You can select a time. And, after the selected time of inactivity, the keyboard backlight will get turned off. This will save some battery life for you.
Yes, there are more options with you can manage. But, don’t make unnecessary changes if you don’t know about them. Hope this article helped you to get back your keyboard brightness controller. And, you were able to Change Keyboard Brightness in macOS Sequoia.
