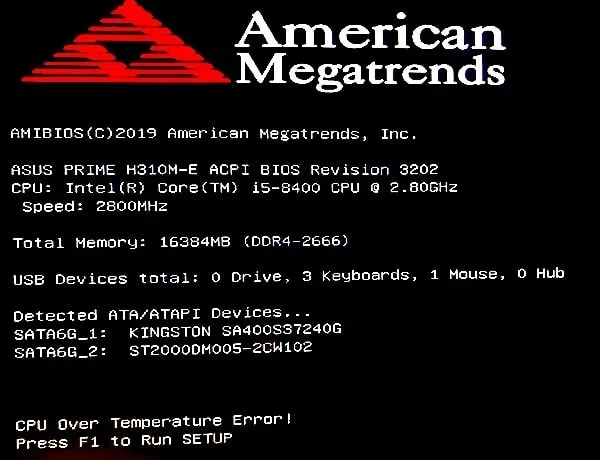
Are you getting CPU Over Temperature Error on the ASUS motherboard with Intel/AMD processor? Well, no worries, this article will help you not only to get rid of this error. Moreover, you will also be able to keep your CPU temperature low, even while gaming.
Apple not only made their Macs faster by transitioning from Intel to Apple silicon processors. But also removed the CPU fan, and now Apple M1 Macs don’t need any kind of cooling. Yes, Intel and AMD processors are also getting more powerful with every new generation. But, these high-end processor needs proper cooling. And, if you don’t provide proper cooling, then the CPU might stop working due to an overheating issue. And, you will get “CPU Over Temperature Error”. This error appears in the ASUS motherboard so that it can save the CPU from damage.
Usually, this error appears during the booting process or when you restart your PC. Or, this error can appear when your CPU gets too hot due to intensive tasks. This error is something to be concerned about if it occurs during normal PC usage.
What causes the CPU Over Temperature Error?
ASUS BIOS shows this error when all CPU core temperature reaches 100 °C. And, the heatsink or CPU fan isn’t able to cool down the processor. This could be due to the thermal paste/grease being hardened. In that case, you have to replace it. Or maybe, the CPU fan isn’t rotating at the correct RPM. However, there might be other reasons why the CPU temperature is so high.
Usually, in summer in hot areas, users face such problems. Doesn’t matter how good is your CPU cooling system. If your room temperature is quite high, then the CPU temperature will also rise. Or, it might be possible that you have not provided proper ventilation to the CPU. Moreover, if you don’t clean your CPU from time to time, then dust also can be the culprit. If you have done some overclocking on your CPU, then clearly this is the cause.
Thermal Throttle and Ideal CPU Temperature.
Modern processors do thermal throttle. Which can save your CPU from damage, before it’s too late. If thermal throttling is turned on. Then, it will adjust the CPU clock speed based on the amount of heat it is currently generating. Basically, it helps to cool down the chip by lowering the speed when the processor gets too hot. Unfortunately, this will reduce performance, that’s why a proper cooling system is necessary.
It’s always better to monitor your CPU temperature. You can download any free CPU temp monitor software for Windows. Ideally, when the computer is running essential apps then 65-70 °C is acceptable. And, while running games 80-90 °C is ok. But, during normal tasks, when the CPU isn’t even working at its full potential. If you’re seeing 95-100 °C, then it’s something you should worry about.
If you’re getting “CPU Over Temperature Error” once in a while during a long gaming session. Then, it’s not something that you should worry about. But, this error message tends to pop up very often during normal PC/laptop usage. Like, while watching a YouTube video or working in a browser. Then, I suggest you follow each and every solution mentioned in this article. And, I assure you, you will be able to decrease CPU temperature.
SOLUTIONS to Fix: CPU Over Temperature Error
Solution 1: Check CPU Utilization and Perform a Clean Boot
Before you go through some complicated settings or open your CPU. It’s better to check your active CPU usage in the task manager. Simply open Task Manager by right-clicking on the start button. And, after that, click on “Performance”. If CPU utilization is already between 90-100%. Then, CPU Over Temperature problems will definitely occur. However, if CPU utilization is normal in the task manager. Then, the problem is with the hardware.
It might be possible that some unknown background process or third-party app is causing trouble. Or, it could be malware. So better if you first perform a clean boot. Clean boot is a process in which Windows boots only with the required services and apps. Once you perform a clean boot, do check your CPU temperature and active CPU usage in the task manager.
Solution 2: Control CPU Fan Speed using ASUS BIOS Settings
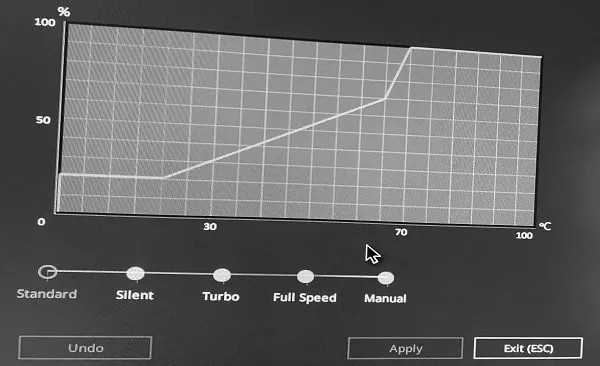
ASUS UEFI BIOS Utility not only shows CPU and Motherboard temperature. But also lets users control CPU FAN and CHA FAN speed. By default, the fan speed is set to Standard mode. In standard mode, the fan speed changes according to CPU temperature. So, if you do so many things on your computers like gaming, work, editing, and web browsing. Then, this mode is good for cooling down the CPU.
Yes, there are so many Fan Controller Software available which you can try to control CPU Fan Speed.
But, if you constantly do intensive tasks. In that case, you can set the CPU fan speed to full to temporarily cool down the CPU temperature. BIOS settings will also help you to find out whether the CPU fan is working properly or not.
- Turn off your computer completely first.
- Turn the computer back on, and keep pressing F2 or Delete to enter into the ASUS BIOS.

- Now you can see your CPU temperature in BIOS Utility. If it’s already above 70 °C. Then, the problem is something else, so do try the next solution.

- Okay, once you note down the CPU temperature. Click on QFAN Control to change the FAN speed.
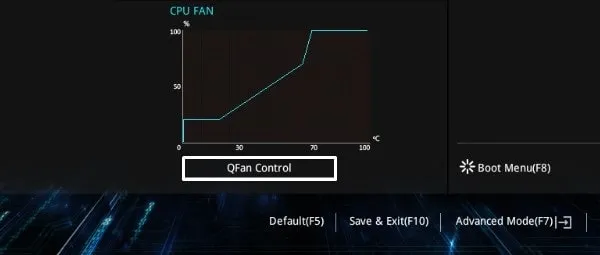
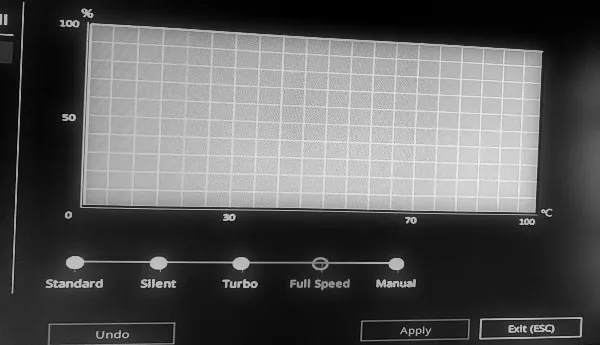
- You will now see all connected CPU fans. But, we want to change the speed of the processor fan. So, keep the CPU Fan option selected, and select “Full Speed”.
- Press the Esc key to go to the main BIOS Window. Now see CPU temperature comes down or not. If you see no changes in temperature, then something is wrong with the CPU fan. Maybe due to a dirty heatsink or fan, the CPU isn’t cooling down.
- Now, change the fan speed back to standard mode.
- After that, press F10 to save and exit. Windows will get started after it.
Solution 3: Clean the Heatsink/CPU Fan (Cooler)
Personally, this solution worked for me. I hadn’t cleaned my CPU Fan and Heatsink since the time I built the PC. And, because of that, dust was clogged in between the heatsink and processor. Due to that, the heatsink wasn’t able to increase the heat flow away from the processor. So, the heatsink basically takes the heat away and dissipates it, before the processor gets overheated. It doesn’t matter if you’re using a stock CPU fan or a different CPU cooler. You have to clean the CPU Fan/Cooler from time to time.
However, if the problem occurs right after building the PC. Then, maybe, you haven’t placed the CPU Fan/Heatsink correctly. If you do not have enough knowledge regarding PC building. Then, you have to take your system to a technician to clean it. Or, take it to the store from where you’ve built your PC. Else, you will end up doing more damage to your system.
In a computer, the CPU heatsink is attached to the CPU fan. So, you have to remove the CPU fan to clean the heatsink.
- First, turn off the Computer completely and remove the power plug as well. After that, simply locate your processor and CPU fan on the motherboard.
- First, check if the CPU fan is loose or not. If it is then this is the problem. Otherwise, disconnect the CPU fan cable from the motherboard.
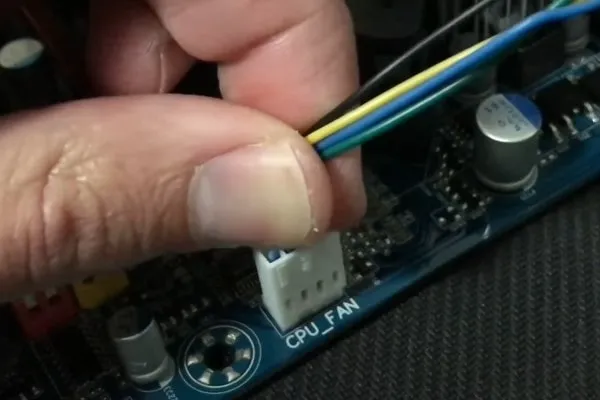
- After that, unscrew the CPU fan and take it out.
- Now, use an air blower and clean out all the dust from the CPU Fan/ Heatsink and from over the processor. You can use a soft brush as well. Personally, I used a computer air blower to clean dust.
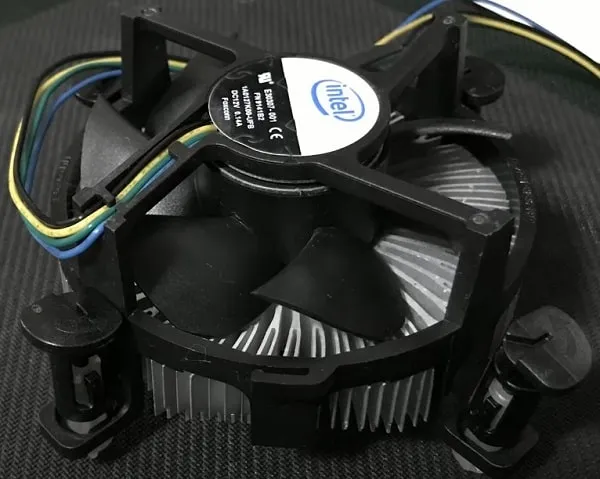
- That’s it, now connect the CPU fan again to the CPU. And, open the computer and you will see the temperature is now at a lower level.
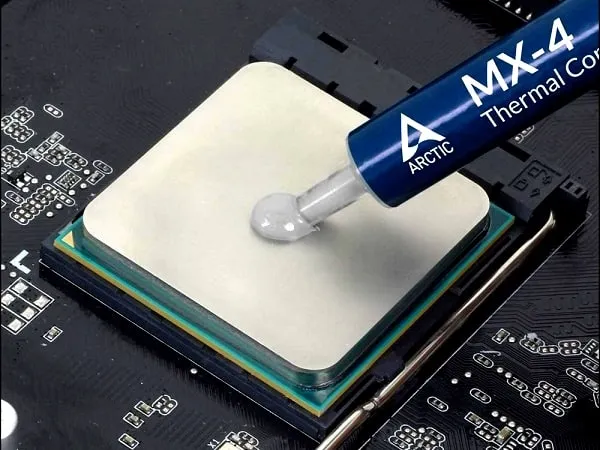
Solution 4: Change thermal paste/grease
Apart from cleaning the CPU Fan/Cooler heatsink, one more thing you should take care of is thermal paste. Yes, cleaning will help reduce CPU temperature. But, you can reduce more by using a good thermal paste. If the thermal paste on the CPU surface got hardened, then you have to change it. On the market, you can find a lot of good thermal paste/grease with a cleaner.
Thermal Paste Types.
Mainly, you will find metal, ceramic, and silicon thermal compounds. But, it would be better if you chose a ceramic thermal paste.
Because ceramic paste doesn’t contain any metal, it means they are not conductive. That’s why ceramic is safer to use and cheaper.
However, liquid metal thermal paste provides large a decrease in temperature. But, these are highly electrically conductive and require extreme care.
Silicon thermal paste comes pre-applied on the thermal pads. Which you can place between the processor and heatsink. So overall, the ceramic paste is good in most of the use cases.
Is it necessary to change the thermal paste?
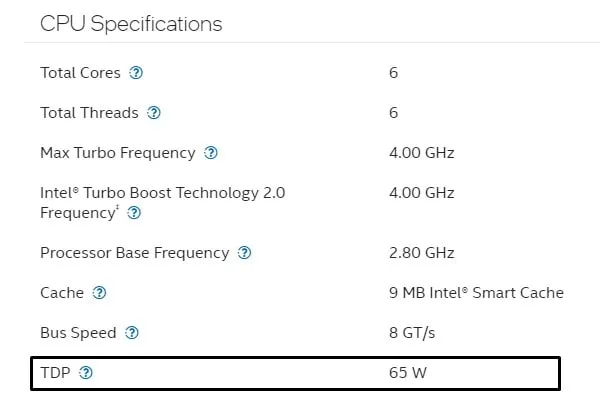
You have to change the thermal paste once every two years. But, if you’re using a high-end CPU that produces a lot of heat. And, if the processor TDP (Thermal Design Power) Value is quite high like 165W, then you have to change the thermal paste once a year. Because high TDP means that the processor will release a lot of heat.
But, if you have a CPU with a TDP value like 55W to 65W, then you don’t have to pay too much attention to the thermal paste for 2 years. And, these days, Intel stock fan/heatsink comes with pre-applied thermal paste. You can check the TDP value of the processor from the CPU Manufacturer’s website.
How to change thermal paste?
Simply remove the CPU Fan/Heatsink and clean the old thermal paste from the heatsink and over the processor. Most of the thermal paste comes with a cleaner to clean out the old thermal paste. Once you clean it, apply thermal paste. Don’t apply too much. Otherwise, CPU Over Temperature Errors will occur more frequently. You can take the help of a technician. Or, if you want to DIY, then watch some YouTube videos to understand the procedure. Because there are so many methods available to apply thermal paste.
Solution 5: Setup PC Cooling Fans for Proper Air Flow
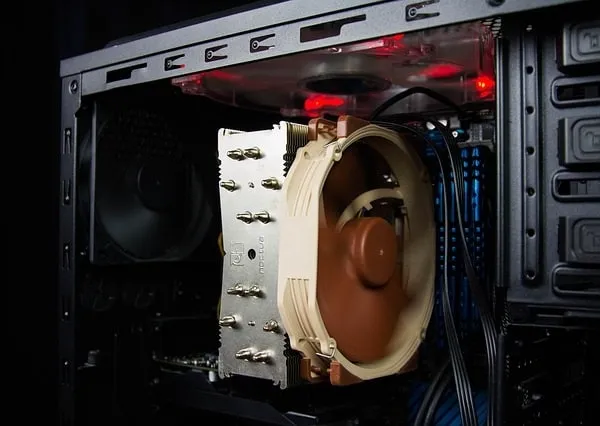
If an error is appearing with a new PC, even after cleaning up everything. Then, maybe you haven’t done proper CPU ventilation. Maybe your CPU case is blowing hot air inside instead of throwing it outside. So, first, open your CPU case, and turn on the PC. And, now check the CPU temp monitor app to track CPU temperature. If the CPU temperature is going down, it means something is wrong with the cooling fan setup. Watch some YouTube videos to fix your CPU cooling system.
Solution 6: Stop CPU Overclocking
If you’re doing CPU Overclocking with stock cooling fans. Then, your processor will heat 10x. Because an overclocked CPU takes too much load and that leads to an overheating problem. Clean booting will stop overclocking software. But, if you have overclocking from BIOS, then restoring BIOS settings to default will be a good idea.
Summing-up
Okay, so these were solutions that you can apply when “American Megatrends CPU Over Temperature Error” appears on the ASUS Motherboard. First, disable the overclocking software and perform a clean boot. If that doesn’t work, then check CPU fan is working at the right speed or not. After that, remove the CPU fan and clean the heatsink. Also, clean the CPU completely using a brush or air blower. If that doesn’t work then change the thermal paste if it’s got hardened. Also, make sure you have set up cooling fans correctly. And, make sure, your room is not too hot. You can also clear CMOS if none of these methods works. Let me know in the comment section whether the CPU temperature decreased or not.
