
Recently, I have encountered another DNS issue while browsing sites in Google Chrome. Maybe, you are also facing the same “DNS address could not be found” Error. This Error prevents users from accessing some websites. Although, you don’t need to worry about it. It’s a standard DNS error, which can resolve efficiently. And, in this article, you will get to know about all possible solutions to fix this Error.
What is DNS?.
Simple Explanation. Domain Name System is known as DNS. We use Domain names to access websites on the internet. For example, If you’re accessing a site with a (www.example.com) domain name. And when you enter the domain name in Web Browser. Web Browser uses the linked IP address to that domain to open that particular site and internet resources. And, Domain Name System(DNS) works as an intermediator to translate Domain Name to IP Address.
What is the “DNS address could not be found” Error?.
Ok, maybe, you already understood this Error after reading about DNS. As I mentioned, a DNS address is used to resolve Domain Name to IP Address. This Error can occur due to the misconfigured DNS Settings or DNS server down problem. Also, it could be possible that some chrome extensions or add-ons are preventing DNS from working.
Suppose the local cache is returning an old IP address. And the IP address got changed on the server level. Overall, there are multiple causes behind this Error. So, there are numerous solutions, which you have to try one by one. And, when the Error will get resolved, you can stop trying the next solution.
Server DNS Address Could Not Be Found – Solutions.
Solution 1: Find out Website IP and add to Hosts File.
Every site’s DNS address is linked to an IP. And, when you first time tries to open a new website. DNS server resolve domain name into IP address. So that you can access a website; also, the DNS server keeps a cache of the website and IP in a file. So that next time, it can open the site faster. If you’re able to access other websites, then you can follow this solution. In this solution, we will add the website domain name and IP address into the host file. It will resolve the DNS issue. Though it’s a temporary solution, so I suggest you follow the following solutions as well.
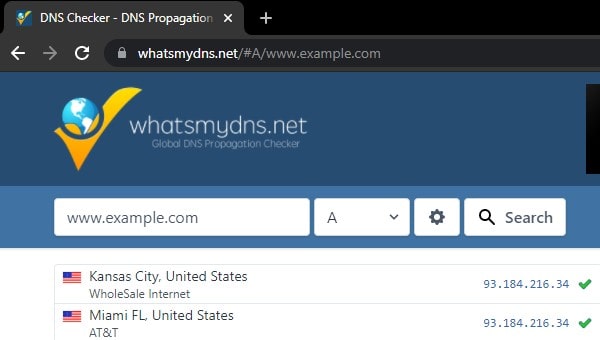
1. Open whatsmydns in your browser. It is a DNS checker used to check the nameserver of websites. By checking the A name record, you can find the IP address of any website.
2. In the DNS checker, enter the URL of the website that you cannot visit. Select A name record and then click on search. You”ll find out the IP address of the website.
For demonstration, I am typing www.example.com in it. (Replace it with the actual URL.)
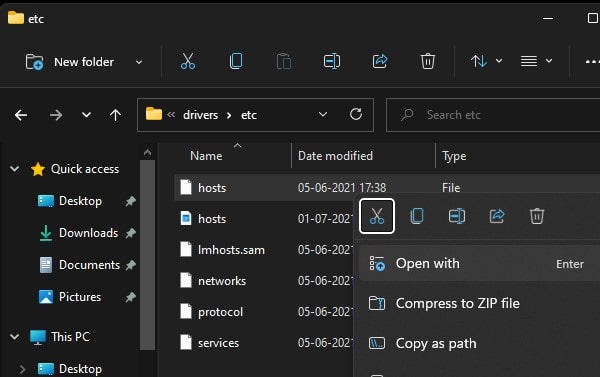
3. Now, open File Explorer and open the following directory in it. (You can copy-paste it in the file explorer address bar.)
C:\Windows\System32\drivers\etc
4. You will now find two hosts files in the folder. Check the type of file in which “file” is written. Right-click on it and then click on “open with”. Now select notepad from the app list.
5. By default, there will be not any entries in it. Well, you can add a new entry after the comment lines that start with #.
93.184.216.34 www.example.com example.com
Replace IP with that you copied earlier, and enter the domain name in www or non-www format. The above is just for example.
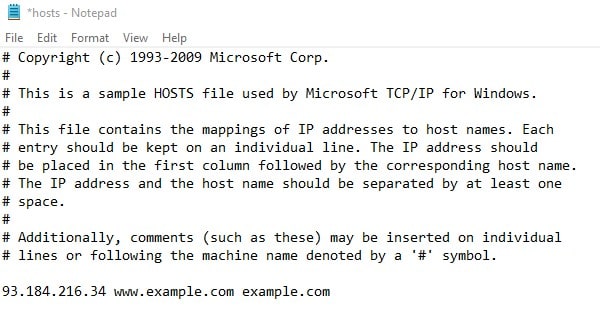
6. After that, in notepad, click on file > save.
We have already pointed the domain to the IP address of this server, so this will look up the route locally before querying your DNS. If the site still doesn’t open, then it’s probably the site’s fault.
Solution 2: Delete files from the etc folder.
I found this solution on a Windows forum. On it, many users already solved this error with this solution. The Etc folder contains hosts, networks, protocol, and services files. Deleting these files will not cause any other error. I have tried, so you can also.
1. Here is the directory of the etc folder.
C:\Windows\System32\drivers\etc
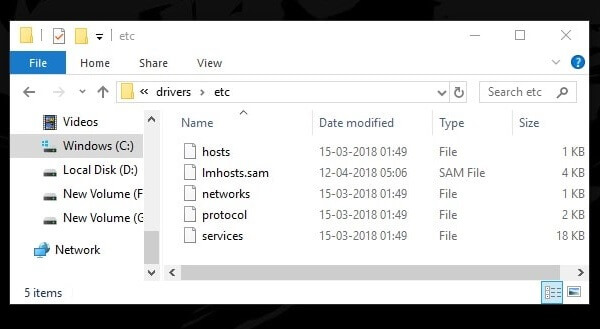
2. Open the etc folder, and then select all files and then delete. Make sure you are logged in from the administrator account. Else, you will not able to delete these files.
Solution 3: Delete Chrome host cache.
Chrome host cache can store up to 100 domain details. And if Chrome host cache is full or corrupted due to some extensions. Then, an error like “DNS address could not be found” occurs. It is the easiest solution to try, and it works. Though, this solution is specific for chrome browsers. Will does not work in any other browser.
1. Open this URL in Chrome Browser.
chrome://net-internals/#dns
2. After that, you will be able to see the “Chrome host cache” option. Click on it, and it will clear the host cache immediately.
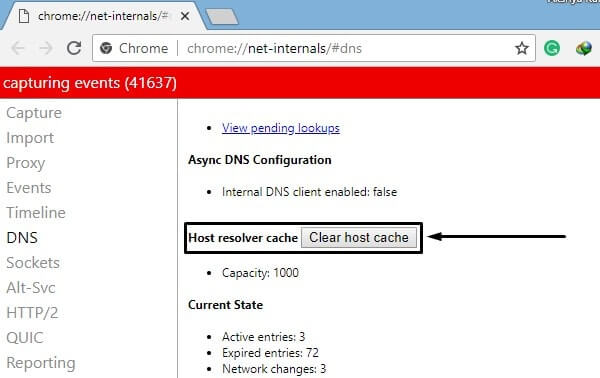
3. Now, check problem is resolved or not. If not then try the next solution.
Solution 4: Reset Chrome Browser Settings.
If your internet connection was working fine, and the problem started all of a sudden. Then, maybe the issue is with the browser. As I mentioned before, extensions also can be the reason behind the “DNS Address Could Not Be Found” error. So, before resetting the Chrome browser, you can uninstall all extensions.
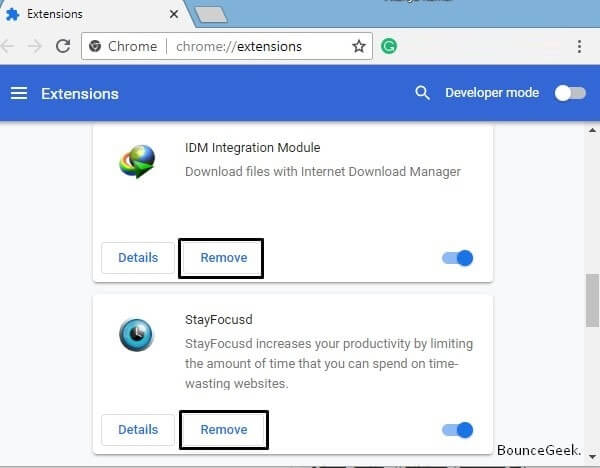
1. Open the following URL in the Chrome browser.
Chrome://extensions
2. Now, use the remove option to uninstall all extensions one after one.
3. If after uninstalling extensions, the problem still exists. Then, you can reset the Chrome Browser.
Reset Chrome Browser.
1. Open, the following URL in Chrome.
chrome://settings/
2. Scroll down a little and click on the “Advanced” option.
3. At the end of the Chrome Settings page, you can find out “Reset and Clean up” option.
4. Click on “Restore Settings to their original defaults”. Then, Click on “Reset Settings” to start the process.
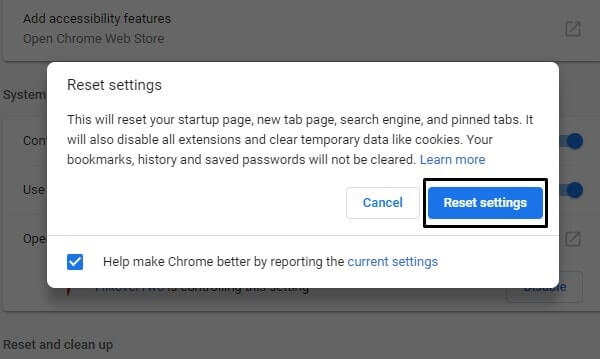
Note: Make sure you’re using the latest version of Chrome. Else this option will not appear on your Chrome Settings Page.
Solution 5: Restart DNS Client Service.
DNS Client service does caches Domain Name and registers the full Computer Name. And if this service is stopped. Then, all other services that depend on it will fail to start. Though, still, the domain resolving process will stay continue. So, I suggest you restart this service once to fix this issue.
1. Press Windows + R key simultaneously to open the run window.
2. Type services.msc and press enter.
3. In the services window, look for “DNS Client”. Click on it and then click on the restart button.
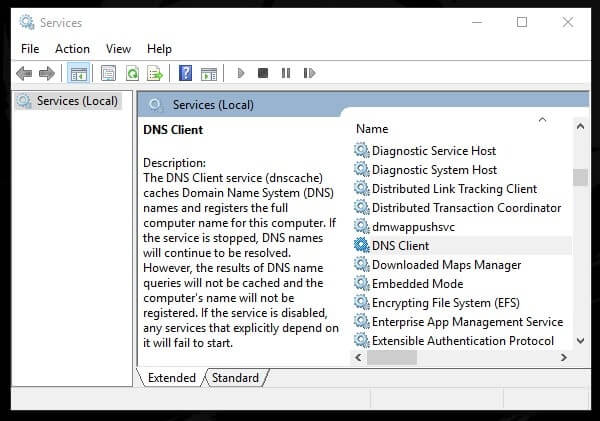
4. Alternatively, you can right-click on it to restart. Hopefully, this solution will fix the DNS server that could not be found error.
Solution 6: Flush DNS and Renew IP.
Apart from the DNS issue, some users are facing a “server IP address could not be found” error. Though, this solution will fix both problems. I have already mentioned this solution in my “DNS_PROBE_FINISHED_NXDOMAIN” article. You can check out the third solution of that article.
1. Open the command prompt to give the following commands. Or, you can use Windows Powershell. (Right Click on the Start button of Windows 10, then click on “Windows PowerShell(Admin).)
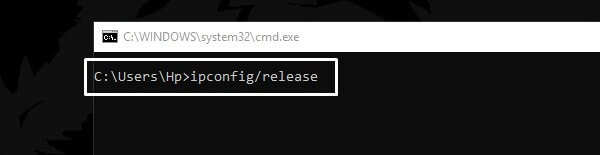
2. To Release IP address type the following command. Press Enter.
ipconfig/release
3. After that, type the following command to renew the IP. Press Enter after typing the command.
ipconfig/renew


4. Now to Flush DNS type the following command and press enter.
ipconfig/flushdns
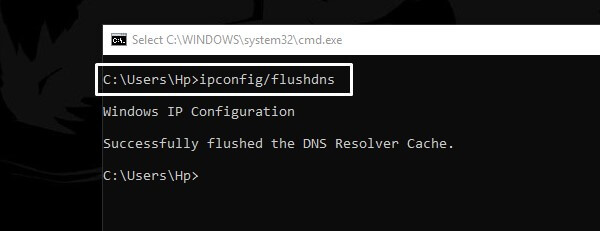
5. That’s it. You have successfully flushed DNS Resolver Cache.
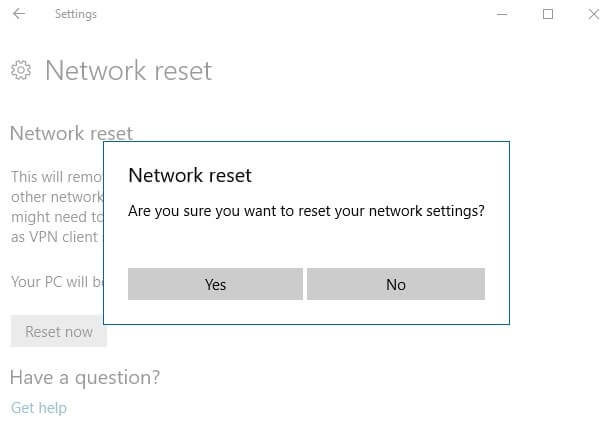
Solution 7: Reset Network Settings.
Although, the above solution will fix the DNS Address not found error. But, still, the error is coming, then you can try to reset network settings. This option is currently available in Windows 10 Only. So, if you’re using an older version of Windows, then you can skip this solution.
- Press Windows + I key simultaneously to open Settings App in Windows 10.
- Click on “Network & Internet”, after that, scroll down a little.
- Now, you can find out “Network Reset” option. Click on it, then click on “Reset now”.
Note: If you’re connected to a WiFi network, then the password will get removed.
Solution 8: Change DNS Server Settings.
As the error indicates that, DNS Address is missing. So, you can fix this error immediately after adding new DNS Server details. There is many open DNS Server available. But, I suggest you use only Google Public DNS. It will speed up your browsing experience. Also, the “Server DNS Address Could Not Be Found” error will get resolved.
1. First, Open Control Panel, now, go to Network and Internet\Network and Sharing Center.
2. In the Network and Sharing Center, you will be able to see all active internet connections.
Click on your internet connection. (I am using a WiFi network.)
3. WiFi/network status window will get open. Click on the Properties button.

4. In WiFi Properties Window, Click on “Internet Protocol Version 4(TCP/IPv4). Then, click on Properties of it.
5. To enter Google DNS details, click on “Use the following DNS server address”. Enter the following details and click on OK.
Preferred DNS Server: 8.8.8.8
Alternate DNS Server: 8.8.4.4

Though, IPv4 DNS Server details will solve this error. But, still, you can try adding IPv6 details to fix this error.
6. Select “Internet Protocol Version 6” from the same WiFi/Network Properties Window. And, click on Properties.
7. Now, choose the “Use the following DNS Server Details” option and enter the following details.
Preferred DNS Server: 2001:4860:4860:0:0:0:0:8888
Alternate DNS Server: 2001:4860:4860:0:0:0:0:884
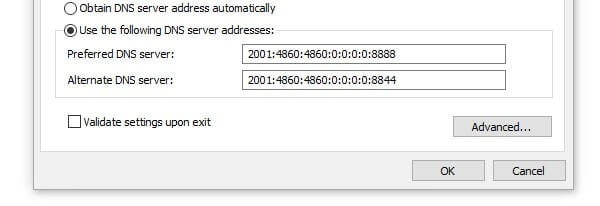
8. Click on OK. That’s it. Now, the “DNS server cannot be found” error will get permanently solved.
Solution 9: For Android Users.
If “DNS address could not be found” error coming in Android Device. Then, you can fix this error by using an App.
- Download DNS Changer App from Play Store.
- Open App, choose “Google” as a DNS Provider.
- Click on Start Button.
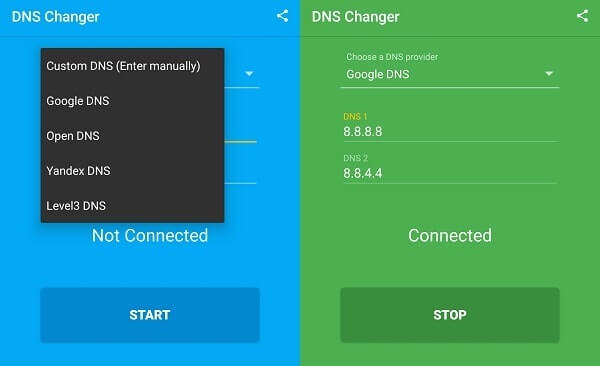
That’s it. Now, open any Website, you will not receive any error. But, you need to stay open App in the background. Because App makes temporary changes.
Hopefully, these working solutions will fix any kind of DNS-related problem. But, if still, you are facing an error. Or, you know a better solution. Then feel free to Comment.