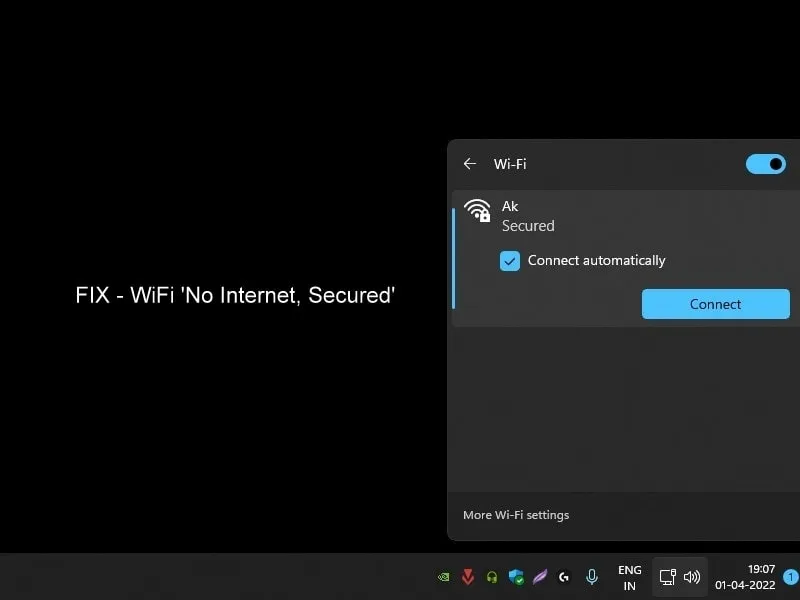
Recently, I was facing an issue with my WiFi network. I was able to connect my PC through a WiFi Router. But, was not able to open any site or use the internet. And, my WiFi connection was showing a “No Internet Secured” error. Normally, a working WiFi network shows a “Connected Secured” message. But, when this error occurs, windows shows a yellow triangle mark on the WiFi icon. Though you don’t have to worry, you can fix this issue. And, In this article, you will get to know some solutions to get back Internet access. If you’re facing a similar problem in Android, then you can read my article on “Android Connected to WiFi but No Internet“.
Error Message Information.
No Internet – Means, Your Internet isn’t working due to some reason. Like, as recent network changes, faulty WiFi router, broken internet line, Unpaid internet bill, invalid IP configuration. Or, maybe some other issue from the internet service provider (ISP) side.
Secured – WiFi network is secured with a Password.
Sometimes, “No Internet, secured” appears even if you have internet access. This means if WiFi is working on other devices (Smartphones). Then, the problem could be with Windows. Most of the users are saying, the problem started after a Windows update.
WiFi Connected but No Internet, Secured
Restart Modem / Router
You have might be heard many times, that restarting a Computer does solve many problems. The same thing applies to Modem and Router. So, If you haven’t rebooted your modem after facing the “No Internet Secured” error message. Then, you should do it immediately. There are multiple ways to restart a WiFi router.
Use Power Key to Reboot – You can reboot the router, from its settings. But, to reboot the modem, you have to use the power key. Press the power key from the backside to turn off the router and modem. Wait for at least a minute. And, after a minute you can turn it back on. Alternatively, you can turn off the main switch for a minute.
Use the Router Settings to Reboot.
1. Open any web browser and visit 192.168.0.1
Note: No internet connection is required, just stay connected to that WiFi network. If it doesn’t work, check the bottom side of the router for the IP Address.

2. After that, Enter default login details if asked. (In a new WiFi router, login doesn’t require.)
Username - admin
Password - admin
3. I am using the Tenda Wireless Router. And, in it, the Reboot option is available under Administration settings. (Don’t reset the router, just reboot it. The reset option will erase your internet settings.)
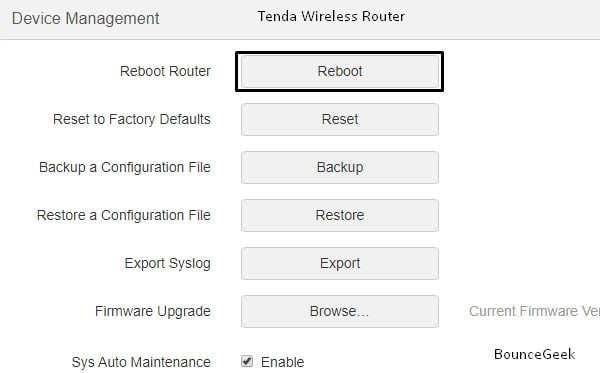
The router will now take a minute to reboot. Don’t press the power key during the process.
Contact ISP (Internet Service Provider.)
There is no point in trying out rest solutions, if, the problem is from your ISP Side. If WiFi isn’t working on any devices. Then, it could be due to some problems with your Internet Service Provider. It could be possible that ISP downtime is running. (Downtime refers to the percentage of time when an Internet Service is inactive.)
Usually, ISP does plan downtime and alerts users about that. Downtimes usually happen due to technical and other maintenance reasons. If it’s unplanned downtime then, it could be due to server failure, natural disaster, or can arise from an unforeseen event.
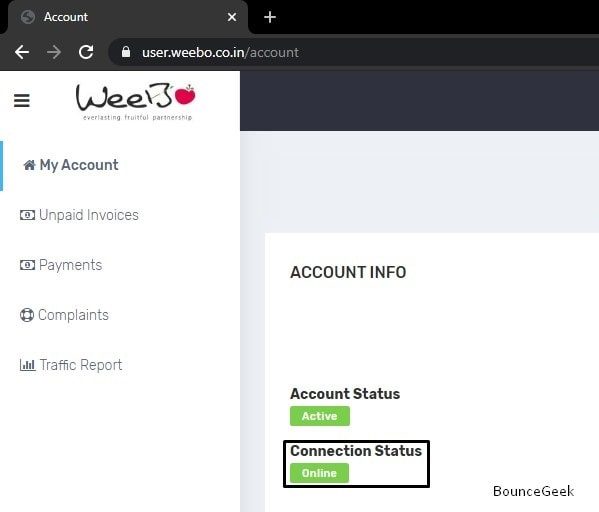
Is my ISP Down?.
You can find out about it without contacting your Internet Service Provider. Usually, ISP does add notice about downtime events on their official site. But, you can check it by login in through your details. As you can see, my ISP status is online, the problem is from my side. But, if you don’t have any way to check that ISP is down, or, not. Then, just contact your service provider.
Update Wireless Network Adapter Driver
If you’re using Wireless N PCI Express Adapter on your PC. Then, it could possible that the outdated driver is preventing your PC from connecting to the Internet. Or maybe driver software got corrupted. In both cases, updating the driver can fix this “no internet” issue.
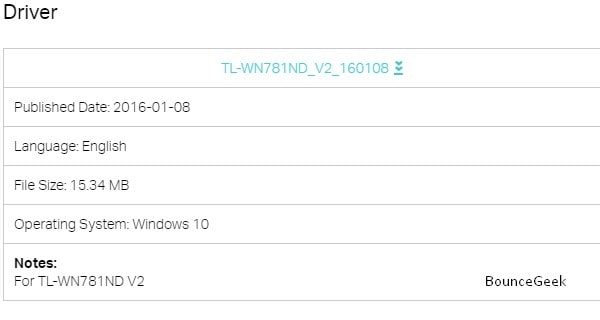
There are two ways to update Driver Software. You can either download the driver software file or install it directly. But for that, you have to be aware of the model number of the adapter. In my case, I built a PC by myself. So, I know, I am using the “TP-Link TL-WN781ND Wireless N PCI Express Adapter“.
But, If the “no internet, secured” Error appears on a Windows 10 laptop. Then, by using the device manager, you can update the driver.
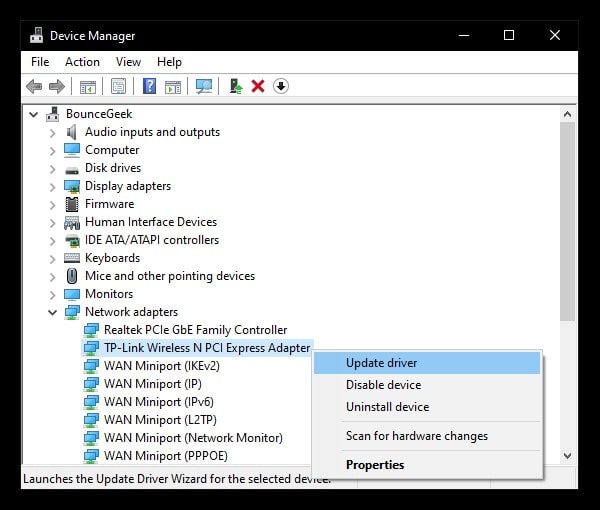
1. Right-Click on the start button in Windows 10 and then click on “Device Manager”.
2. Click on “Network Adapters” to expand network drivers. Now, Identify the wireless network adapter from the list. Right-Click on the network adaptor and then click on “Update Driver”.
3. On the next window, click on the “Search automatically for updated driver software” option.
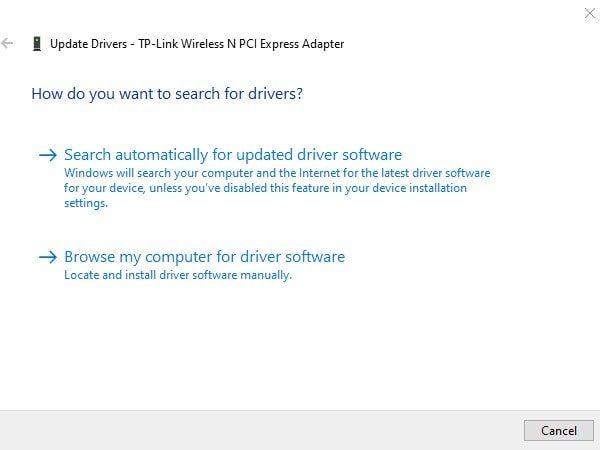
That’s it. Now the device manager will automatically search for the driver and update it.
Enable IPv6 (Internet Protocol Version 6)
The Internet Protocol Version 6 is known as IPv6. It is the most recent version of the internet. IPv6 is faster than IPv4. And, IPv6 enables data communications over a packet switch network. So, if you’re using Fiber Connection then make IPv6 enable.
1. Right-click on the network icon and click on “Open Network & Internet Settings“.
2. Click on “Change Adaptor Settings“.
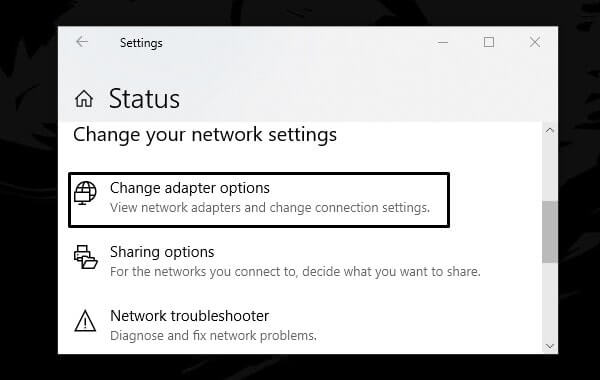
3. It will show you all the available internet connections. Right-Click on the WiFi network then click on properties.
4. Mark “Internet Protocol Version 6 (TCP/IPv6)” and then click on OK.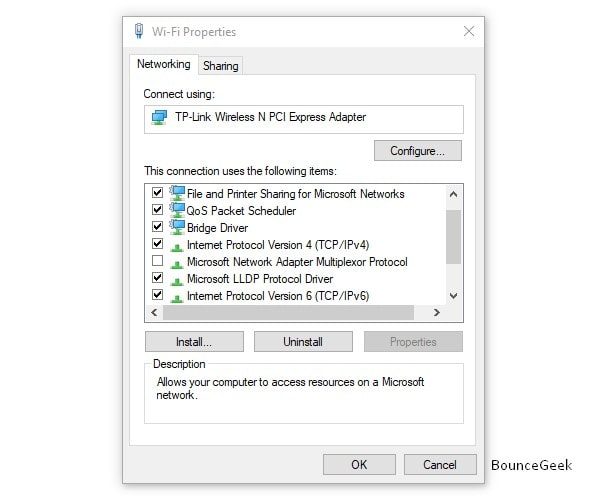

That’s it. Restart your Computer once and the error will get resolved. If the error still exists, then you can disable IPv6 using the same method. Just mark it again and click on OK.
Change Power Saving Settings for WiFi
Did the problem suddenly occur on Windows 10 laptop? Then, maybe it is because of power settings. Microsoft is trying to make Windows smarter. This means, that Windows is capable to turn off hardware, which you are not using. In simple words, if power saving mode is enabled for the Wireless adapter. Then, you need to set it to performance mode. So that it can stay always ON.
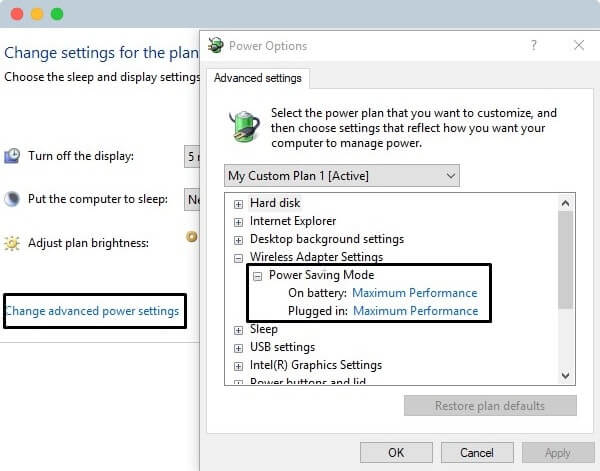
- Right-Click on Battery Icon and then click on Power Options.
- Control Panel will get open, click on “Change Plan Settings”. After that, Click on “Change Advanced Power Settings”.
- In Advanced Settings. Expand “Wireless Adaptor Settings”.
- Then, the Power Saving Mode. Set both options to Maximum Performance and then click on OK to make changes.
On Battery: Maximum Performance.
Plugged In: Maximum Performance.
That’s it. Now you will never face the “No Internet, Secured” error. There is one more power setting, which you need to check.
- Reach Network Connections Page by using solution 4. (Or, Press Windows + R key, type “ncpa.cpl” and press enter.)
- After that, Right-click on WiFi then open properties.
- Click on the “Configure” button. Then click on the Power Management tab.
- Now, make sure the “Allow the computer to turn off this device to save power” option is unmarked.
- If it’s not then, unmarked it and click on OK to save settings. Hopefully, It will solve the “No Internet Secured” error.
Enable NetBIOS over TCP/IP
This method is suggested by a Windows forum. And, it worked for many Windows users. So, I suggest you try it out once.
- Open run Windows and type ncpa.cpl and press enter. It will open the network connections Window.
- Right-click on your WiFi connection then choose the properties option.
- Select “TCP/IPv4” then click on properties. Now, make sure you’re using static IP. (Click on “Obtain an IP address automatically”.)
- After that on the same window click on the “Advanced” button.
- Then, Click on the “WINS” tab. And, select the “Enable NetBIOS over TCP/IP” radio button. Click on OK to all windows to save this setting.
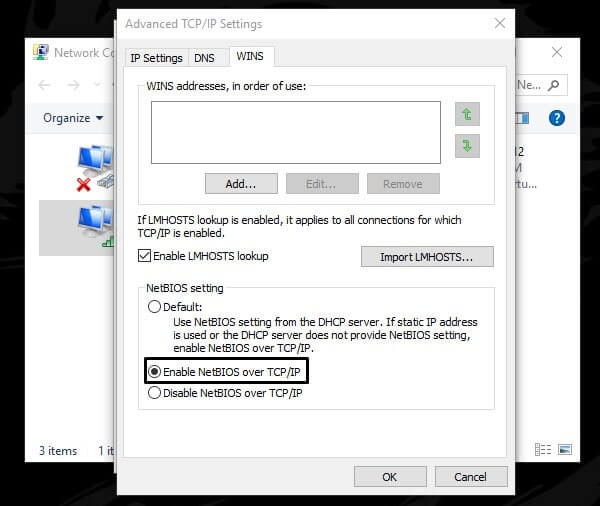
That’s it. Hopefully, the “No Internet Secured” error will get solved now.
Use Network Troubleshooter.
Windows 10 comes with many troubleshooters for specific Windows problems. And, Yes, there is a troubleshooter available for network-related problems. This troubleshooter will help you to find the right cause behind the error. And, will diagnose your internet connection problem.
- Press Windows + I key simultaneously to open the Settings App in Windows 10.
- Click on “Network & Internet”.
- Now you will be able to see the “Network troubleshooter” option. You just need to click on it.
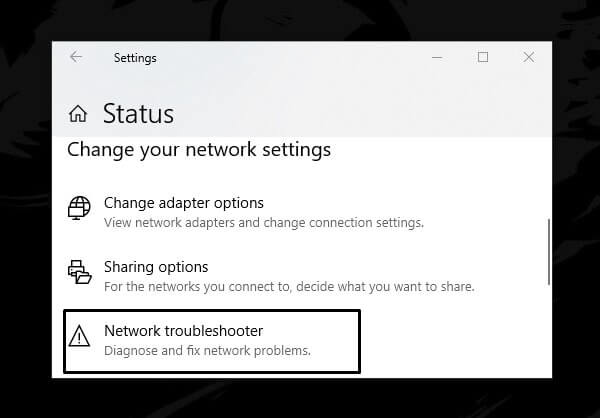
And, it will automatically diagnose and fix this error. But, sometimes it doesn’t work. That’s why I have added these solutions.
Check Network Servies
To keep the internet working and stay connected. There are some Windows services that need to stay running. It could be possible that, due to some third-party program, service might get stopped.
Here are the names of these Network Services. To check the status of these services. Press Windows + R key to open the run window. Type “Services.msc” and press enter.
- UPnP Device Host.
- TCP/IP NetBIOS Helper.
- DHCP Client.
- DNS Client.
- Function Discovery Provider Host.
- Function Discovery Resource Publication.
- SSDP Discovery.
If a service is on “manual mode” or on “running” then it’s OK. But, if it “stop” then you need to start to fix the “WiFi No Internet Secured” error.
Uninstall Recently Installed Program
Have you installed any program recently?. Then, it could possible that the software is creating conflict with network services. So, Uninstall all recently installed programs.
Network Reset
Like Android devices, Windows 10 also comes with a network reset option. If you think, the problem occurred due to some network changes are done by you. Then, this is the best solution. Don’t worry, it will only reset the network. You will not lose any data. Though, the WiFi password will get removed by performing Network Reset.
- Open Settings App in Windows 10/11. (Press Windows + I key)
- Click on “Network & Internet”.
- If using Windows 11, then go to the advanced Internet Settings Option.
- Scroll down a little, and then click on the “Network Reset” option.
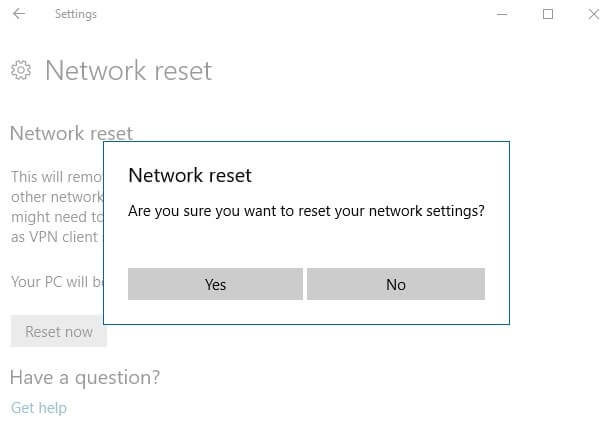
Click on the Reset now button, after that click on ‘Yes’. Your Computer might will get the restart. (The WiFi password will get erased.) That’s it, so these are the solutions which you can try. When the Internet doesn’t work on Windows 10 PC.