Undoubtedly, Apple devices work best within the ecosystem. For instance, the iPhone gets synced with the MacBook. However, if you connect an iPhone to a Windows PC, it won’t work exactly the same. Additionally, certain iOS features may not work. Like, viewing iPhone live photos on a Windows 10/11 PC isn’t that easy. Apple first introduced live photos in 2015 with the iPhone 6S series. Since then with every iOS update, the live photos feature has been improved.
What are Live Photos on iPhone?.
In iPhone’s camera app you get an option in the upper right corner to turn live on/off. If the live option is enabled, then iPhone will click a live moving picture instead of a normal still picture. The live picture is nothing else but just a three-second short video. And, in three seconds, the iPhone records what happens 1.5 seconds before and after you take a picture.

On iPhone, you can tap and hold over an image to view a live photo. However, you can’t do the same in Windows with live pictures. So, here are some ways to View iPhone Live Photos on Windows 11 PC/Laptop.
Play iPhone Live Photos on Windows 11
1. View Live Photos on Windows using the New Media Player App.
When you click a live photo, it will save it in a JPG/HEIC and MOV file format. This means, two files get created. JPG/HEIC image file will be the still image that opens when you tap on the live photo. And, the MOV file will be the actual live photo that plays when you tap and hold over the photo.
JPG/HEIC File Format.
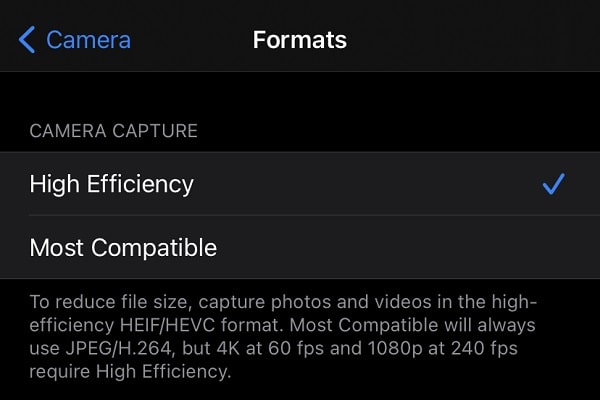
If in-camera settings, the “High-Efficiency” option is selected, the image will get saved in HEIC format. And, if the “Most Compatible” option is selected, then the file will get saved in JPG format. Yes, you can open HEIC files on Windows 11 easily.
First Transfer Live Photos (MOV Files) to Windows PC.
- First, connect your iPhone to your Windows PC via cable.
- After connecting via cable, give all necessary permissions that show up on your iPhone. Tap on “Trust” if you’re connecting iPhone to Windows first time.
- Open File Explorer App. Click on “This PC” from the left pane.
- Now, open the following directory.
This PC\Apple iPhone\Internal Storage\DCIM- In the DCIM folder, you will see many folders. (These folders are created according to month.)
- Open the folder in which the live photo is saved. You will now find the two files of the live photo. One will be in the JPG/HEIC format and the other will be in MOV file format.
- Copy MOV File and paste it on the desktop or anywhere you want. (Like, you normally copy files in Windows.)
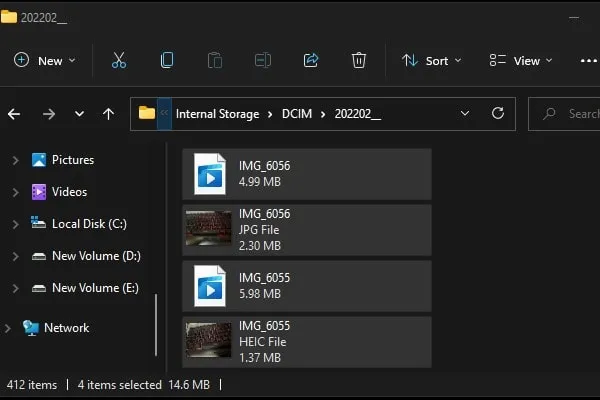
- Once, the live photo (.MOV File) gets transferred to Windows. You can open it by using these apps.
Open/Play MOV Files on Windows 11.
On Windows 11, there are two Apps available that you can use to open MOV Files. Yes, you can install some third-party apps as well. Let’s start with the default apps.
Films & TV App – Windows 10 and 11 come with Films & TV App. That is capable of playing MOV Files. But, you have to install “HEVC Video Extension” first. Because by default the Films & TV app doesn’t support HEVC video format. No worries, you can install it for free. And, we have written a detailed article on, “Play MOV Files on Windows“. So, do check out that article to play live photos on Windows 11.
PS – Microsoft is turning the “Films & TV” App now into a movie rental service.
Windows 11 Media Player – Microsoft recently released New Media Player App, which is the replacement for Groove Music App. And, if you’re using the latest Windows, then read my article on “Install new media player on Windows 11“.
- Once you install the new media player app. Simply right-click on the live photo (MOV file). And, then go to Open With > Media Player.
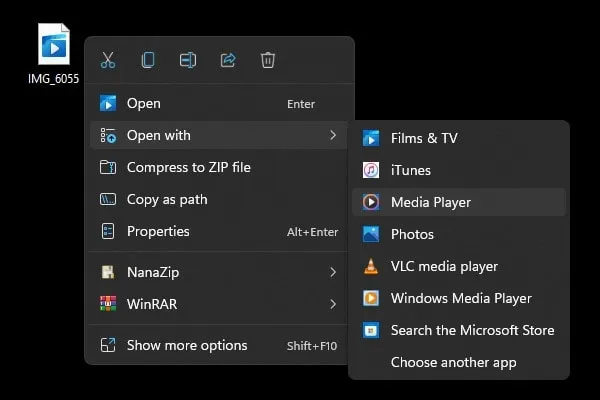
- New Media Player app will get open and the Live Photo will start playing.
- To Play Live photo in loop mode. Simply press Ctrl + T keyboard shortcut. Or, you can click on loop icon.

- That’s it, live photo or video will start playing in a loop.
That’s the way you will get the iPhone’s live photo-like feel in Windows 11.
Make Media Player App default to Open Live Photos.
- Right-click on the MOV file and then go to open with > choose another app.
- Now, select the media player app from the list. And, enable the “Always use this app to open .mov files” option. Click on OK.
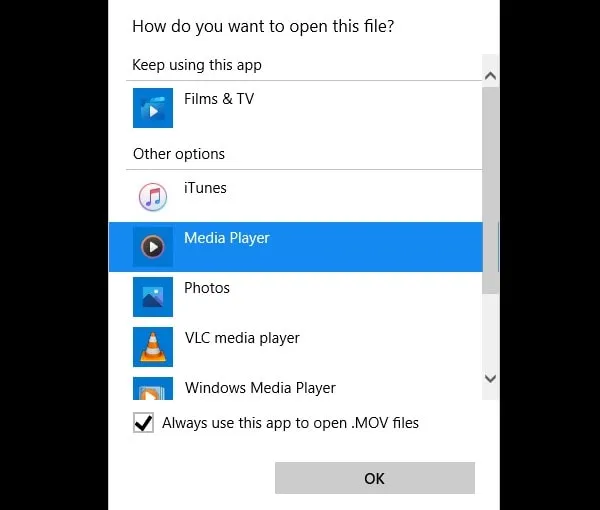
That’s it, now by default all your live photos will play into the new media player app. This means you can simply connect your iPhone to a Windows PC and view live photos.
2. Use iCloud Photos to View Live Photos
If you have enabled iCloud sync for Photos. Then, you can simply view your iPhone live photos on Windows by opening iCloud Photos. To check iCloud is enabled for Photos App or not. First, open the Settings App > Tap on your name > iCloud > Photos > Enable iCloud Photos. Also, do make sure you have enough free storage. Apple offers free 5GB of space.
- In Windows, you can either download the iCloud App. Or, you can simply use a browser. Setting up the iCloud app and Apple device drivers might take some time. So better use your favorite browser and open the iCloud website.
- Once you open the iCloud site, it will ask you to sign in. Use your Apple ID to log in.
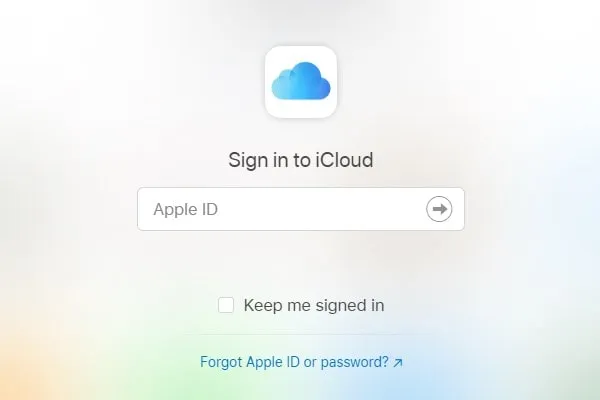
- Once you complete the login process. Tap on the Photos App.
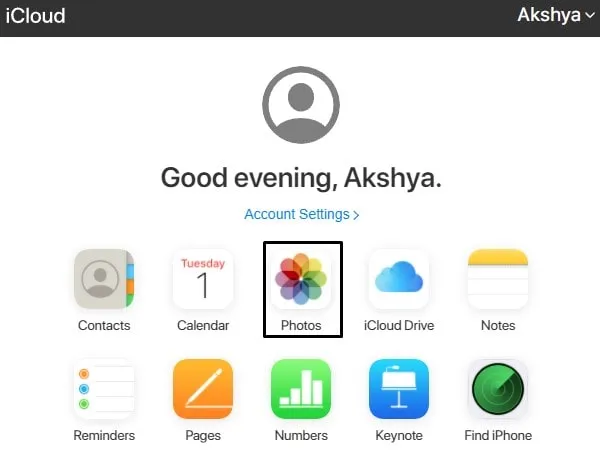
- That’s it, now view live photo. And, it will open like your iPhone Photos App.
You can also download live photos. And, it will get downloaded in HEIC/JPG and a MOV File Format.
3. Convert Live Photo to GIF on iPhone
In Windows, you cannot view live photos exactly as you do on iPhone. Although, the first method is good if you want to open a live photo MOV file. But, if you want to make the live photos look good in Windows. Then, you can convert live photos to gifs using Photos App. Yes, the iPhone photos app is capable of converting photos into GIFs. It is a hidden feature of the iPhone that only a few people know. And, here is how you can do so.
Note: You will lose live photos sound, once you convert it to GIF.
- Open the Photos App on iPhone, tap on Albums.
- Scroll down now, and from media types, tap on Live Photos.
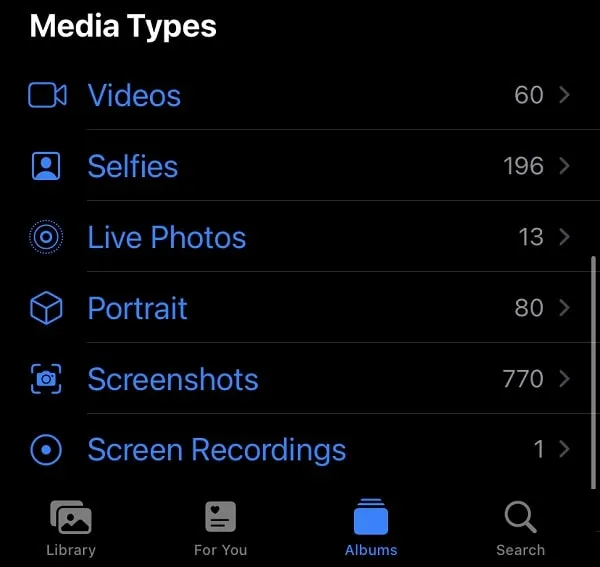
- Here you will find all your live photos. Do tap on any live photo.
- Tap on Live. And, you will see four options. Live, Loop, Bounce, and Long Exposure.
- You can choose between Loop or Bounce.
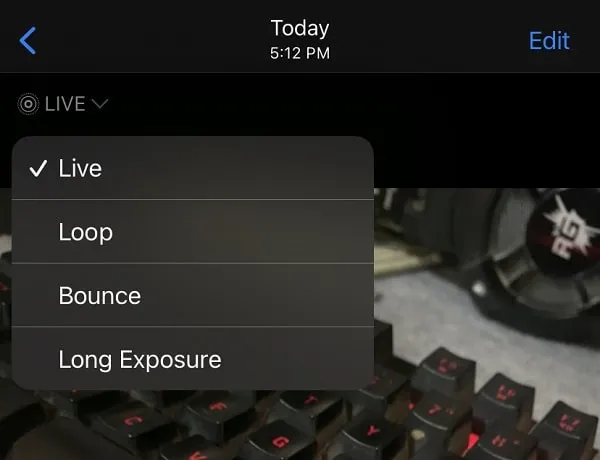
- Once you select Loop or Bounce. Go back to the Albums section in Photos App.
- Now, in media type, you will see the “Animated” option. Tap on it.
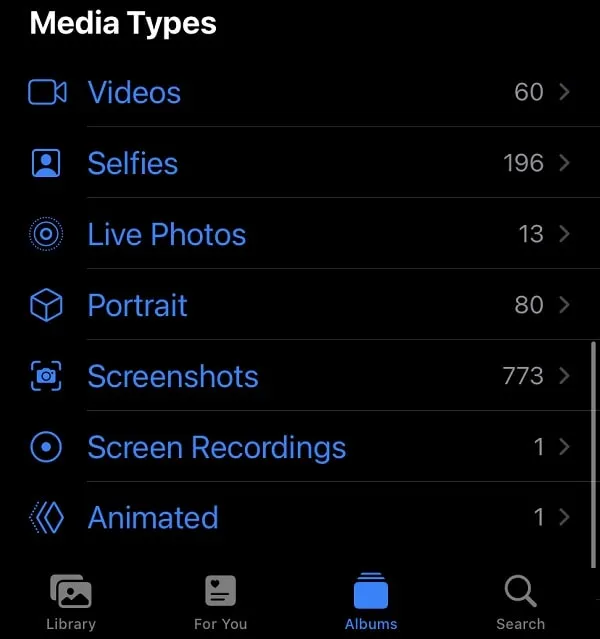
- In Animated, you will find all live photos converted into GIFs.
- Open any GIF photo. Tap on share.
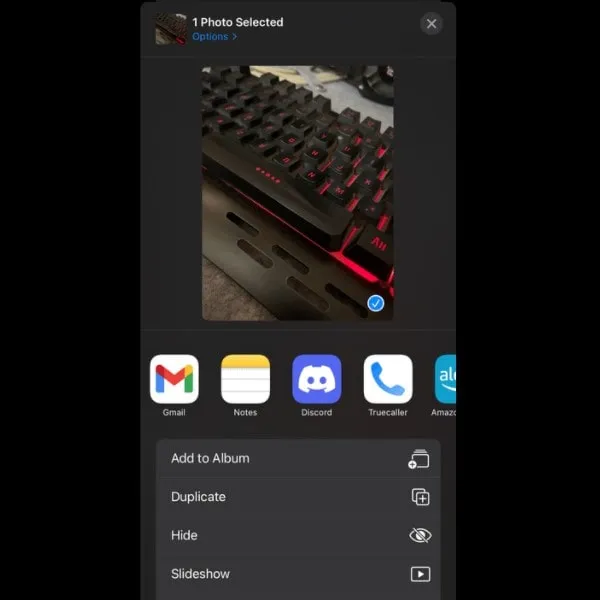
- That’s it, now you can share gif files via email, WhatsApp, or any other app.
- I suggest you share the gif image using the Gmail App. And, later you can open the mail on Windows. And, you can use any browser or photos app to open GIF.
So, this was the easiest way to convert live photos to GIFs. All you need to do is switch the live option to loop/bounce.
4. Use Lively iOS App to Convert Live Photos to GIFs
If you don’t like the inbuilt feature of the Photos App to convert. Then, you can use a third-party app to do so. Although, there are plenty of apps available. But some of them are paid, and some don’t work well. But no worries, you can now convert photos to gifs with one click using the Lively App.
Note: Personally, I think the second method is good enough. Because Lively App leaves a watermark. And, you have to pay to remove it.
- Install Lively App from App Store.
- Open App, and it will ask you to select photos. Or, you can allow access to all photos.
- Tap on the photo, and after that do tap on Export GIF.
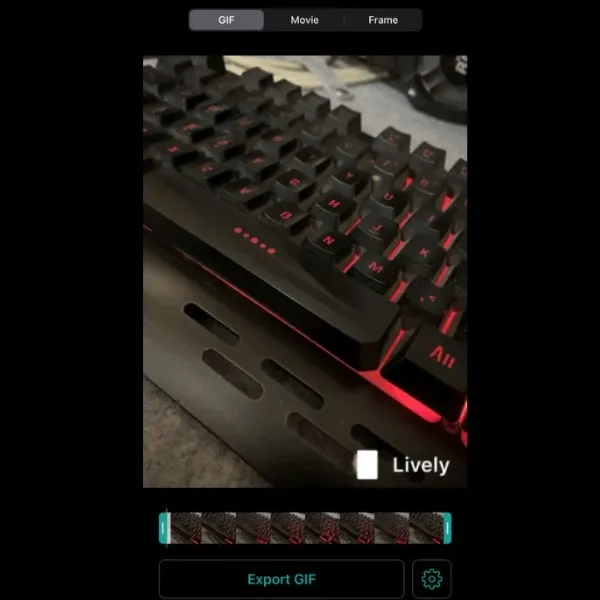
- Now, you can either save the GIF or send it to someone. Or, you can later transfer GIF files to Windows via cable.
Okay, these were the methods to open iPhone live photos on Windows 10/11 Computer. You can transfer live photos to a computer. And, can use the media player app to open MOV Files. Or, you can use iCloud Photos in Windows. Alternatively, you can convert live photos to GIFs and can easily open them in Windows. Let us know in the comment section if you have any other better way to do so.
