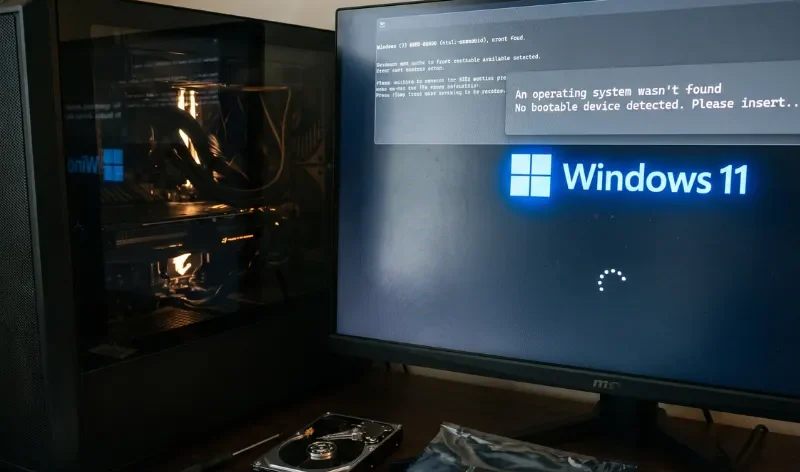
Getting trapped in an endless Automatic Repair loop or seeing a “No Boot Device Found” error after a routine Windows 11 cumulative or preview update is stressful. These patches can occasionally corrupt the Boot Configuration Data (BCD) stored on your EFI system partition or alter UEFI firmware settings—such as Secure Boot states or storage controller modes—making your internal drive invisible to the system.
Instead of turning to a full system reset, you can systematically verify storage visibility, repair the bootloader, or remove the faulty update.
Troubleshooting Post-Update Startup Boot Loops and Missing Boot Devices on Windows 11
Step 1: Verify Hardware and Storage Visibility in BIOS
Before running software repairs, make sure your computer’s motherboard actually detects your storage drive. Post-update glitches sometimes reset firmware flags or hide NVMe/SATA configurations.
- Turn on your computer and immediately press the manufacturer’s designated key (usually F2, F12, Del, or Esc) repeatedly until you enter the BIOS or UEFI settings menu.
- Locate the Storage Information, NVMe Configuration, or Boot Priority section.
- Check if your solid-state drive (SSD) or hard drive appears in the device list.
- If the drive is missing: Look for settings related to Intel VMD, VMD Controller, or RAID Mode, and try disabling or toggling them if your installation used standard AHCI drivers. Also verify that Secure Boot is enabled or temporarily toggled if your update changed signature databases.
- Save your changes and exit the BIOS (usually by pressing F10). If the computer still fails to boot into Windows, proceed to the recovery environment.
Step 2: Access the Windows Recovery Environment (WinRE)
If Windows cannot load, you need the recovery tools to run repair commands.
- Power on your computer. While the manufacturer logo or the Windows spinning dots are showing, press and hold the physical Power button for about 10 seconds to force a shutdown.
- Repeat this process two more times (three interrupted startups in total).
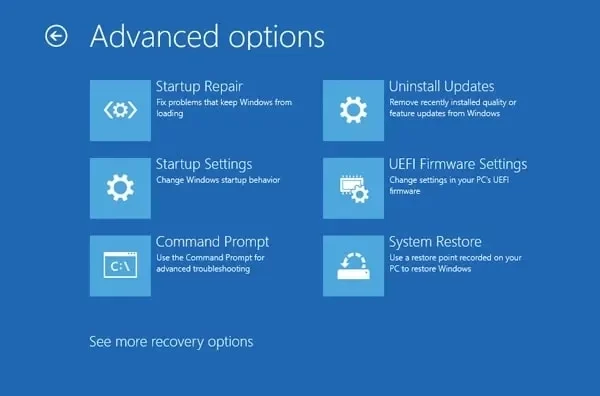
- On the next startup, Windows should show Preparing Automatic Repair. Wait for the Automatic Repair screen to appear, then click Advanced options. If you land on a blue Choose an option screen instead, continue from step 4.
- Click Troubleshoot, then click or select the Advanced options, then Command Prompt.
- If prompted, select your administrator account and enter its password. A PIN will not work. If the account has no password, leave the field blank and continue.
*Note: If WinRE fails to trigger or your recovery partition is damaged, plug in a blank USB flash drive (8GB or larger) created using the official Windows 11 Media Creation Tool on another PC, boot from that USB, select your language, and click Repair your computer in the bottom-left corner to access the Command Prompt.*
Step 3: Map Partitions and Repair the EFI Bootloader
Step 3: Map Partitions and Repair the EFI Bootloader
Add BounceGeek as a preferred source to find more of our tech guides and troubleshooting articles on Google.
When updates corrupt boot parameters, rebuilding the EFI bootloader from the command line usually restores normal startup.
Before you begin: You should already be in Command Prompt inside the Windows Recovery Environment (Troubleshoot → Advanced options → Command Prompt).
- In the Command Prompt window, type
diskpartand press Enter. - Type
list diskand press Enter. Find your system drive and check that it has an asterisk (*) in the Gpt column. This confirms it uses UEFI/GPT. If there is no asterisk, the disk uses legacy BIOS/MBR and this method does not apply. - Type
list volumeand press Enter. Find the FAT32 volume labeled System in the Info column. It is typically 100-550 MB. Note its Volume number (for example,Volume 3) and check whether the Ltr column shows a drive letter. - If the EFI volume has no drive letter, assign one by typing the following (replace N with the EFI volume number):
select volume N
assign letter=S
If it already has a letter, note it and use that letter instead of S below.
5. Type exit and press Enter to leave Diskpart.
6. Find your Windows drive letter. In recovery, it is often not C:. Test the likely letters until one lists a Windows folder:
cmd
dir C:\Windows
dir D:\Windows
dir E:\Windows
Use the letter that shows folders such as System32.
7. Rebuild the boot files (replace C with your Windows drive letter and S with your EFI letter):
cmd
bcdboot C:\Windows /s S: /f UEFI- Expected result: You should see “Boot files successfully created.”
- Close the Command Prompt window, click Continue to exit to Windows, and restart your computer normally.
If bcdboot fails: The EFI partition’s contents may be damaged. Reformat it and run bcdboot again. This erases everything on the volume you format, so double-check it is the small FAT32 System partition first.
cmd
format S: /fs:fat32
bcdboot C:\Windows /s S: /f UEFI
Avoid bootrec /fixboot on UEFI systems, as it commonly fails with “Access is denied.” That is why bcdboot is the preferred tool here.
Step 4: Uninstall the Faulty Update (Fallback)
If rebuilding the bootloader does not stop the loop because a specific cumulative or preview patch is inherently broken on your hardware configuration, uninstalling the update from WinRE is your safest fallback.
- Re-enter the Windows Recovery Environment by repeating the hard shutdown steps outlined in Step 2.
- Navigate to Troubleshoot > Advanced options, and click Uninstall Updates.
- Choose Uninstall latest quality update (this removes the most recent monthly cumulative or preview patch). If that fails to resolve the loop upon reboot, return to this menu and select Uninstall latest feature update.
- Follow the on-screen prompts, allow the process to finish, and restart your computer.
Summing-up
Do start with the easiest solution first, check wheather BIOS sees your drive and that boot mode is UEFI. After that, do enter the recovery environment and rebuild the EFI boot files with bcdboot command. Most post-update boot loops and “missing drive” errors resolve at one of these two solutions. If the drive does not appear in the BIOS at all, treat it as a possible hardware failure and get it checked with local computer shop, before attempting further repairs.


