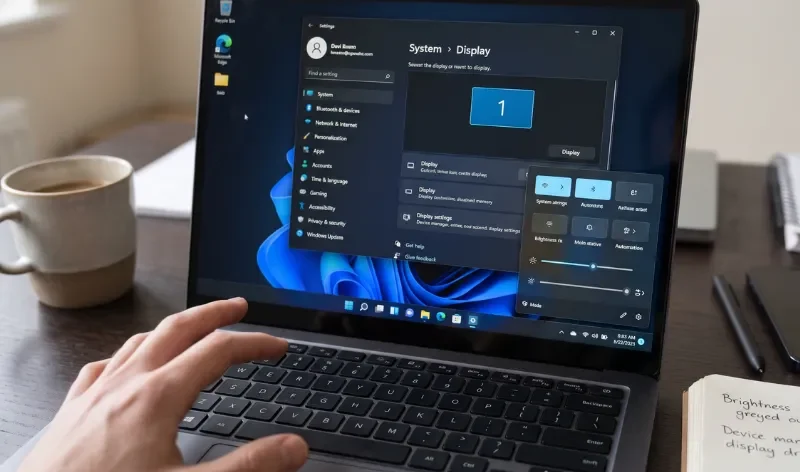
Are you trying to adjust your screen brightness on your Windows 11 laptop, only to find the slider completely greyed out and your keyboard shortcuts doing nothing? It is a frustrating issue that often pops up after a system update, a graphics driver handoff glitch, or waking your laptop up from sleep. When this happens, Windows temporarily loses its communication link with your display panel, locking you out of luminance controls.
Most generic troubleshooting guides suggest running a basic system file check or updating your main graphics driver, but those steps often miss the underlying culprit: multi-GPU handoff conflicts or a corrupted monitor driver state. You can fix this issue by targeting these specific display communication layers directly.
Method 1: Set Display Enhancement Service to Automatic
I tried many solutions to fix this issue. But, this was the only solution worked for me. Due to some third-party software Display Enhancement Service got conflicted, due to that my brightness slider is greyed out and won’t work.
- Press Win + R, type services.msc, and hit Enter.
- Scroll down to find Display Enhancement Service. Right click on it and then click on properties.
- Change the Startup type to Automatic and click ok.
Method 2: Refresh Your Display Adapters in Device Manager
When Windows 11 loses track of your panel’s active display path, forcing a hardware state refresh can instantly restore your brightness controls. This method targets integrated and discrete graphics handoff glitches by restarting your display adapter without requiring a full system reboot.
Add BounceGeek as a preferred source to find more of our tech guides and troubleshooting articles on Google.
- Right-click the Start button on your taskbar and choose Device Manager from the menu.
- Click the arrow next to Display adapters to expand the list of graphics cards installed on your laptop.
- Right-click your integrated graphics adapter (usually labeled as Intel(R) Iris(R) Xe Graphics, Intel(R) UHD Graphics, or AMD Radeon(TM) Graphics) and select Disable device.
- Click Yes on the warning prompt that pops up. Your screen might flicker or pause for a brief second.
- Right-click that same integrated graphics adapter again and select Enable device.
- Check your Action Center or Windows Settings to see if the brightness slider is active once more.
Method 3: Fix the Generic Monitor Driver Mismatch
Sometimes cumulative Windows updates cause your laptop display to fall back to a generic non-PnP monitor state, stripping away the necessary driver hooks required for brightness control. Re-enabling or updating the monitor driver forces Windows to recognize your built-in screen properly.
- Open Device Manager by right-clicking the Start button and selecting it from the list.
- Scroll down and expand the Monitors category.
- If you see multiple entries or a device labeled simply as Generic Non-PnP Monitor, right-click it and choose Update driver.
- Click Browse my computer for drivers.
- Choose Let me pick from a list of available drivers on my computer.
- Uncheck the box that says “Show compatible hardware” if your specific panel isn’t listed, select Generic PnP Monitor, and click Next to finish installing the correct driver profile. Restart your laptop to lock in the change.
Method 4: Reset Hybrid GPU Switching Software
If your laptop uses hybrid graphics switching—such as NVIDIA Optimus or software like ASUS Armoury Crate, G-Helper, or AMD Software—an aggressive power-saving mode might be completely bypassing your integrated GPU. Because Windows relies on the integrated graphics layer to drive panel brightness controls, locking or disabling this path breaks the slider.
- Open your laptop’s dedicated manufacturer control software (such as NVIDIA Control Panel, AMD Software: Adrenalin Edition, or your brand’s specific utility).
- Look for your GPU working mode or graphics output mode setting.
- Switch your graphics mode away from an exclusive “Discrete Only” or “GPU Ultimate” mode, and change it back to Hybrid, Optimized, or Automatic switching.
- Save your changes and reboot your laptop to restore normal hardware handoff between the processors.
Fallback Option: Use a Lightweight Third-Party Brightness Tool
If stubborn driver layers or persistent hardware communication errors leave your native Windows brightness slider permanently unresponsive, you can bypass the system controls using a trusted third-party utility. Yes, you can get brightness slider on Windows 11.
Apps like Twinkle Tray or Display Dimmer run quietly in your system tray and interact directly with supported display monitors via DDC/CI or software overlay dimming layers. Simply download and install one of these utilities, open its system tray icon, and use its independent slider to adjust your screen’s luminance until you can perform a clean graphics driver reinstallation later.