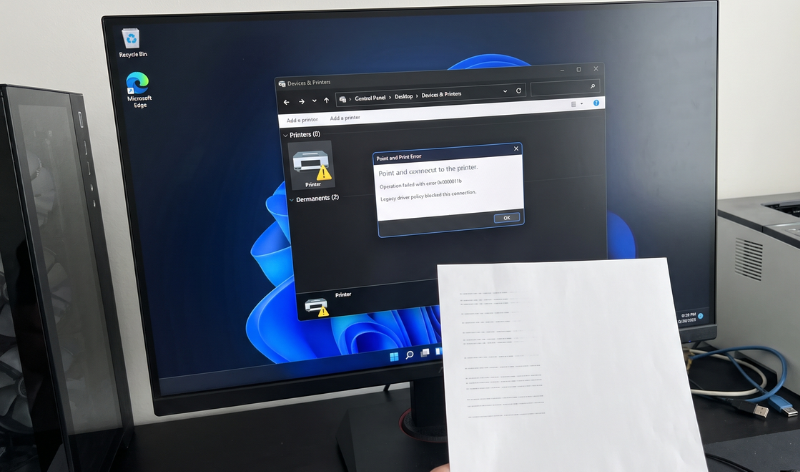
If you are trying to connect to a shared network printer on Windows 11 only to watch the installation fail with a cryptic error code like 0x800B0100 or 0x0000003f, you are likely running into strict security changes. Windows 11 enforces much tighter Code Integrity policies and Driver Store signature validations than older operating systems. When your network client tries to pull an older V3, V4, or legacy kernel-mode driver from a print server, the operating system blocks the package because its catalog file or signing structure does not meet modern validation requirements.
While older workarounds focused strictly on historical remote print vulnerabilities, modern failures usually stem from SetupAPI rejecting untrusted driver packages during the staging process. Fixing this requires you to identify the specific validation error in your client logs, configure approved server policies properly, and handle trust exceptions for legacy hardware.
Step 1: Diagnose the Failure via SetupAPI Logs
Before you change any system policies, you need to find out why Windows 11 is rejecting the printer driver. The operating system records every driver installation attempt in a dedicated text log file, which will show you the exact error code and catalog verification block.
- Open File Explorer on your Windows 11 client machine and navigate to the
C:\Windows\INFfolder. - Look for the file named
setupapi.dev.logand open it using Notepad. - Scroll down to the bottom of the log file to view the most recent device installation entries, or press
Ctrl + Fto search for your printer model name or error codes like0x800B0100(which points to a missing or untrusted catalog file). - Review the entries surrounding the failure to see if Windows blocked the driver due to an untrusted root certificate, missing signature, or a failure during Driver Store staging.
Once you know whether the system is blocking an unsigned catalog or failing a server trust check, you can apply the correct policy fix.
Add BounceGeek as a preferred source to find more of our tech guides and troubleshooting articles on Google.
Step 2: Configure Package Point and Print Approved Servers (GPO)
If Windows is blocking the connection because it does not trust the print server hosting the legacy driver, you can use Group Policy to explicitly whitelist your print server’s fully qualified domain name (FQDN). This tells the client machine that packages coming from your trusted server are allowed to bypass standard restriction warnings.
- Press
Windows Key + R, typegpedit.msc, and press Enter to open the Local Group Policy Editor. - Navigate through the left-hand menu to
Computer Configuration > Administrative Templates > Printers. - Look for the setting named Package Point and Print – Approved Servers and double-click it to open its configuration window.
- Select the Enabled radio button, then click the Show button next to the Options list.
- Enter the fully qualified domain name (FQDN) or IP address of your print server in the value column, click OK, and then click Apply to save your changes.
After updating the policy, open an elevated command prompt, type gpupdate /force and press Enter to apply the new rules immediately before attempting to reconnect to the shared printer.
Step 3: Handle Unsigned or Legacy Driver Trust Exceptions
When dealing with very old legacy drivers that lack modern package signatures, standard point-and-print restrictions will continue to block installation even if the server is approved. You can adjust the driver installation restrictions registry key to allow standard users or administrators to stage these specific payloads.

- Press
Windows Key + R, typeregedit, and press Enter to open the Registry Editor. - Navigate to the registry key location:
HKEY_LOCAL_MACHINE\SOFTWARE\Policies\Microsoft\Windows NT\Printers\PointAndPrint. - If the
PointAndPrintkey does not exist under Printers, right-click the Printers folder, selectNew > Key, and name itPointAndPrint. - Right-click an empty space in the right-hand pane, choose
New > DWORD (32-bit) Value, and name itRestrictDriverInstallationToAdministrators. - Double-click the new value and set its data to
0to allow non-administrators to install certified drivers, or keep it set to1if you prefer to require administrator credentials for legacy staging overrides. Click OK.
Restart your computer to ensure the registry changes take full effect, then try installing the network printer share again.
Fallback Alternative: Manual Driver Pre-Staging or IPP Class Drivers
If strict Code Integrity policies continue to reject the shared driver package entirely, your best alternative is to pre-stage the driver manually on the client machine or switch to a universal fallback option.
You can download the INF-based driver package directly from the printer manufacturer’s website and install it locally on the client via Settings > Bluetooth & devices > Printers & scanners > Add device. Once the local driver files reside securely inside the local Driver Store with proper certificates already trusted by the OS, connecting to the network share will use the local files instead of attempting to stage an unapproved remote package. Alternatively, check if your print infrastructure can utilize modern IPP (Internet Printing Protocol) class drivers that satisfy Windows 11 validation rules natively.